
This is the fifth in a series of blog posts around Git and a new feature in version 72, Git Version Control. See the full list of entries in this series at the end of this post!
If you follow our feature request site, you already know about our upcoming feature, Git Version Control. We have designed it to make hosting repositories as easy for developers as a “Hello World!” script. To make sure you get the most out of it, we want to make sure you’re familiar with Git.
When you begin learning Git, it’s easy to run into issues that might be a little tricky to solve. We want to tell you about a few of the ones we encounter the most, to keep you going full-steam-ahead with Git. If you need help with some of the Git-specific terms in this post, check out Git’s gitglossary.
Help! Apparently, I was beheaded?
While you’re getting used to how Git handles branches, it’s pretty easy to find yourself in something called “detached HEAD state.”

What this basically means is that you checked out a specific commit, rather than checking out the branch itself. Git can also enter this state if you try to switch to an upstream branch instead of the local version. When you check out the whole branch, Git moves chronologically with each recent commit (the HEAD commit at any given time). When HEAD is detached, you’re basically on your own.

Staying in this state — if it’s not intentional — can cause a lot of problems, and any changes you commit from this state might not even belong to a specific branch, so you could end up losing changes.
The easiest way to get to the right branch and preserve your uncommitted changes is to just check out another branch:

Help! Git says things have diverged — a lot.
If you see a message like this (maybe when you run git status), your branch and the remote version have separated ways:

Yikes!
If this is because you haven’t pulled down updates from the remote repository, it’s a pretty simple fix. Just run git pull, and you should be good to go with your changes intact.
Sometimes, though, it gets a little more complicated. You’re up-to-date, you make your changes, you try to commit… and some so-and-so beat you to the punch and committed changes between your last update and your commit.
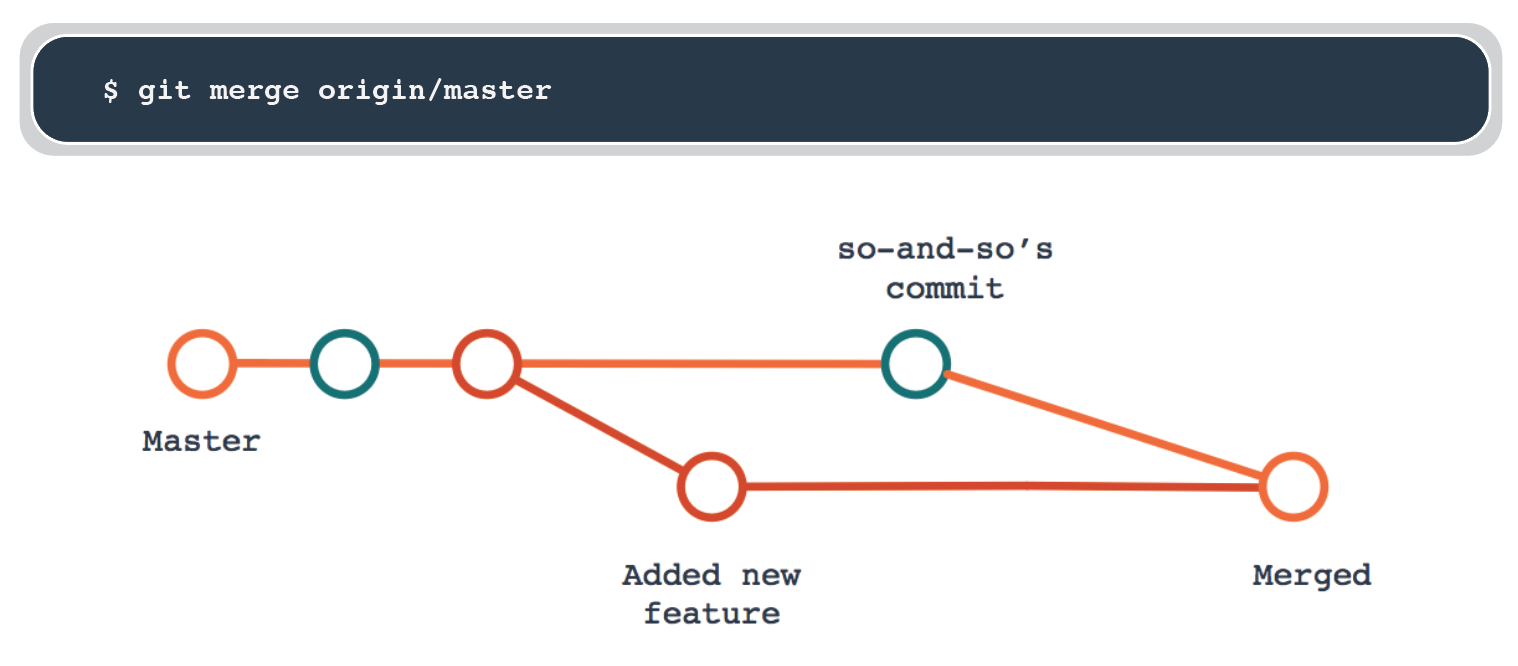
This problem comes with two solutions: merging or rebasing. Which one you choose depends on how you’d like the history to look.
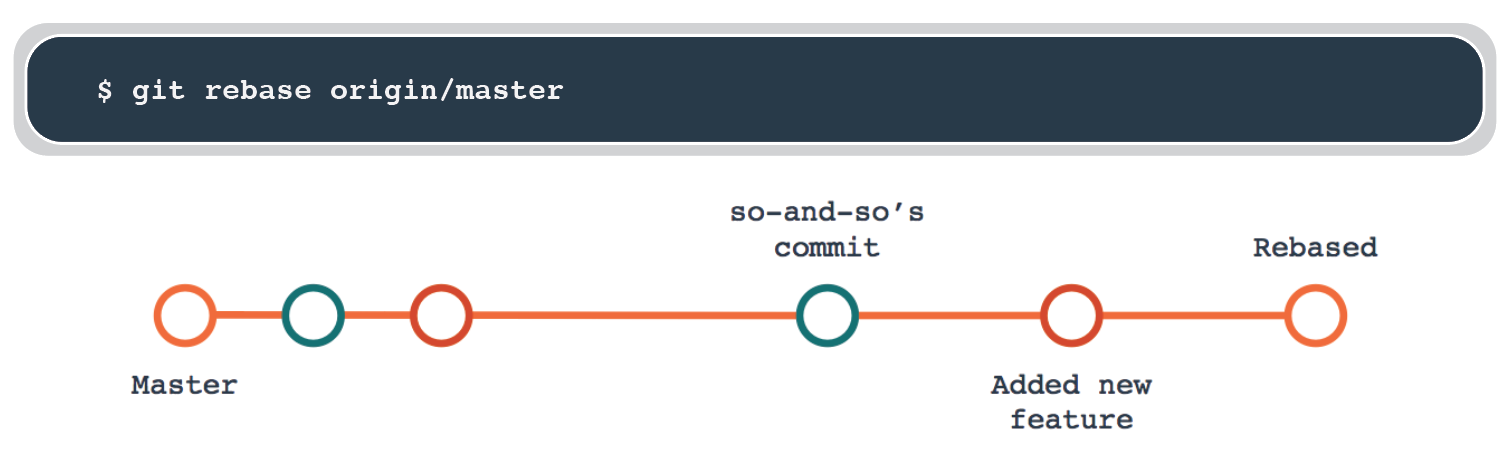
When you merge, Git takes everything from your version of the branch and merges it into the remote version of the branch. This results in a multi-line history, with separate lines of development running in parallel. If you rebase, Git goes back to the point when things diverged, adds the remote changes, and then applies the changes from your branch next, so you get the same nice linear history that you would’ve had if nothing had diverged.
OR
Help! I made changes, but now I don’t like them.
Making changes to any project can require a lot of back-and-forth as you try out new ideas, iterate on improvements, or repair bugs before committing. If something just isn’t working out, the simplest fix might be to just revert it to its original state.

This will grab the version of the file from the last commit to the branch and give you a clean slate to work from.
If you’re feeling a little more hardcore, and you just want to trash everything and start over, you can revert everything at once:

You’ll be returned to the branch’s state at its last commit. Be careful with this option, though. This will reset your entire working tree, and you’ll lose any local commits.
Help! I made changes in the wrong branch!
You made some awesome changes! You might have even committed those awesome changes! You went for a celebratory prune juice! … and then you realized that you did it all on the wrong branch.
This gets trickier if you already pushed your changes to your remote, but as long as things are just local, the fix isn’t too bad.
If you haven’t committed anything, you just need to create a new branch out of the current branch’s contents, and then you can reset the existing branch back to where it started:

Now, you can check out the new branch to add more changes, or continue in your current branch, which is now in the state of the last commit. Easy-peasy.
If you made a commit or two, it’s just a little more complicated. You’ll need to create and check out a new branch (or just check out an existing branch), cherry-pick the commit you want from the other branch, swap over to that branch, and then reset it:
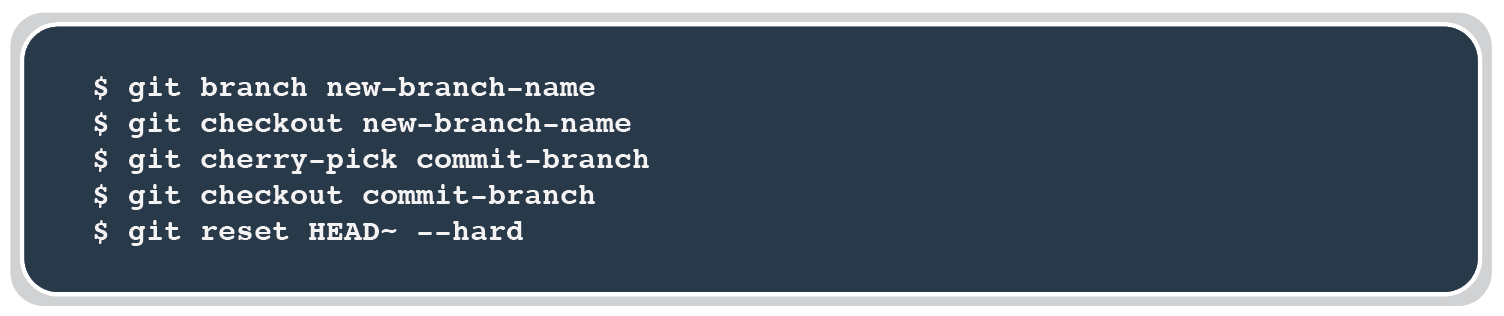
Bam! Your changes are happily perched in the new branch, and the existing branch is back to where it started. Problem solved.
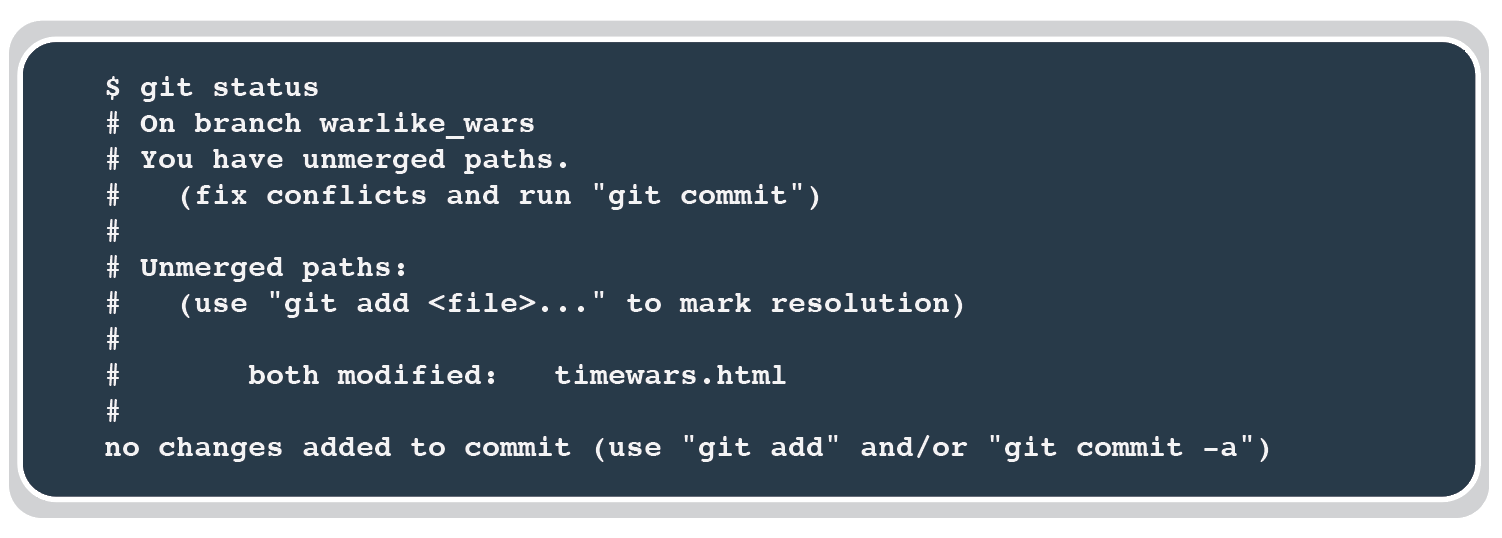
Protip: If you need to find out which branch you’re on, you can run ‘git status’ at any time. It’ll show you your current branch, its state, and any modified tracked or untracked files.
Help! I regret my commit choices!
Git wouldn’t be nearly so valuable without its revision history, and commits are a huge part of that. So, it makes sense that updating commit messages and data after the fact is a pretty common Git function.
If you just need to alter the commit message itself, you only need:

Git will open up the commit message in your preferred text editor, and you can make whatever changed you’d like. This actually creates a new commit and uses it to replace the original, but the outcome is the same as just editing.
You can also use amending to add files you forgot to add to the commit or to update author information. Using this to alter commits that you’ve already pushed is a bit trickier, though, so you’ll want a good understanding of how history revisions work before you give that a try.
Help! I’m a pacifist, but now there’s a merge conflict!
Most of the time, when you integrate changes from one branch into another, Git’s able to automatically merge everything together. Sometimes, though, you’ll run into a merge conflict.

The most common merge conflict involves two sets of changes to the same line(s) of the same file(s). The impacted file will show up in the initial warning message, or you can run git status to find a list of files:
There are some pretty cool merge tools that you can use to handle these situations, or you can fix it on the command line.
If you open up a file with merge conflicts, you’ll see some helpful indicators that show you where the problems are:
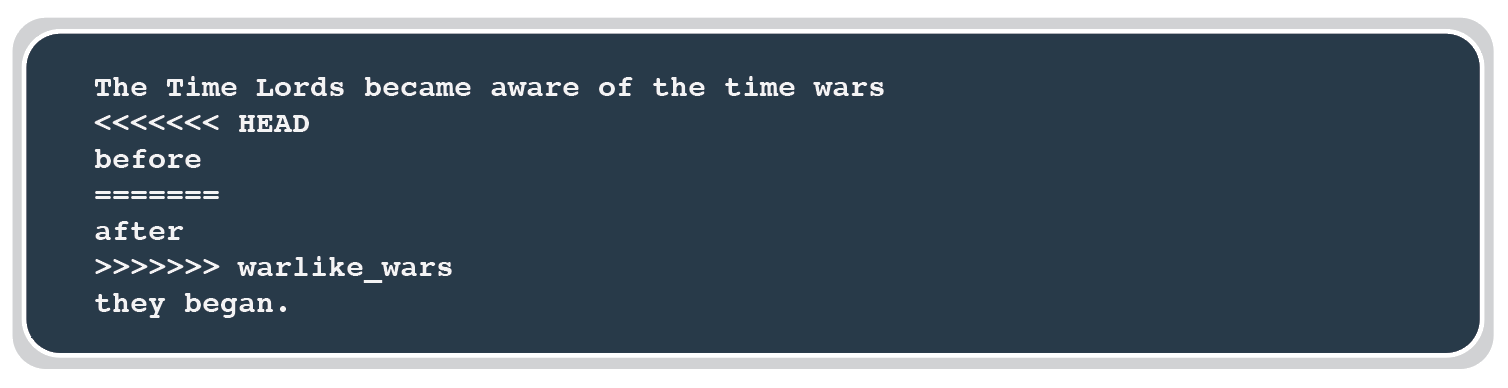
All you have to do is pick what you want to keep, and delete everything else:

Save the file, commit the changes, and the conflict is over.
If you end up seeing the same conflict often, and you always want to fix it the same way, you can be proactive and add the rerere.enabled setting to your Git config file. This records how you resolve the conflict so that Git can automatically resolve that specific conflict the next time that it occurs. This is a little advanced, though, so before you use it, read up on it more here.
I give up! Nuke it from orbit!
If you’ve exhausted everything else and your local, cloned repository’s still on fire, or if you tried a few things but don’t feel like trying anymore, you can ragequit the repository, too. Be careful, this is NOT a safe option for your remote repository! Only do this if you’re using a local repository and can re-clone a separate remote repository. Otherwise, you’re deleting your entire project and won’t be able to recover it. You could do that if you really want to, but starting over from scratch isn’t usually fun.

If you’ve decided it’s worth it, just get out of the repository directory, delete the whole thing, and then clone your project again.

Either way, you’ll lose all of your local changes… but if you’re doing this, you probably didn’t want them anyway.
We hope you don’t have to nuke things from orbit too terribly often, but even if you do, we hope our new Git Version Control feature will help that be just a little easier.
A note from benny:
Ready to give it a shot? This feature is already available to any server on the CURRENT tier. You can also join us in our slack or discord channels, post your questions on the cPanel forums or subreddit, or come visit Houston, Texas for the 2018 cPanel Conference, October 1st – 3rd. Need to catch up on the previous posts about Git Version control? Here they are!
