
The Apache web server is a critical component of cPanel & WHM, but no software can be all things to all people, and that’s why we’re happy to offer alternatives like NGINX and the LiteSpeed Web Server.
We recently wrote about using NGINX instead of Apache in cPanel, and, although we’re working on it, NGINX isn’t yet a fully compatible replacement. LiteSpeed is a different story. It is easy to install, integrates perfectly with cPanel & WHM, and you can make the switch without having to re-learn how to manage your web server from scratch.
In this article, we’ll look at what LiteSpeed is, why you might want to use it instead of Apache, and how to install and configure it on cPanel.
What is the LiteSpeed Web Server?
LiteSpeed is a proprietary web server built as a drop-in replacement for Apache. It supports httpd.conf and .htaccess configuration files, and it works with many Apache modules, including mod_rewrite, mod_security, and mod_cache.
However, under the hood, LiteSpeed has an entirely different design, which in some circumstances, gives it an edge on Apache. Like NGINX, it has an event-driven architecture, so it’s super quick with static content and great for sites that serve lots of concurrent users.
In addition to being blazing fast when serving HTML pages, scripts, and images, it also has a few tricks up its sleeve where dynamic sites like WordPress and Magento are concerned. LiteSpeed has an integrated full-page cache with a plugin system that brings caching to many popular content management systems and ecommerce applications, a feature that would usually require an external application or a plugin managed on the application level.
With LiteSpeed, you can offer hosting clients the compelling combination of Apache compatibility and zero-configuration caching for high-performance. As a server administrator, you benefit from low resource consumption and, of course, excellent integration with cPanel & WHM via a plugin, which includes a comprehensive management interface.
How To Install LiteSpeed Web Server on cPanel
Because it is a drop-in replacement for Apache, the installation process is straightforward. However, there are two prerequisites:
- A LiteSpeed Web Server license. You can buy a license from the cPanel extensions store or use the Free Starter plan on a server with less than 2GB of memory.
- SSH root access to the cPanel server.
We will install the webserver with the official installation script, which you can download and examine here. To run it, log in to your server over SSH as root, and enter this command:
bash <( curl https://get.litespeed.sh ) your_serial_no
Replace “your_serial_no” with the one that came with your license. You are presented with a series of options, and it’s fine to select the defaults. We’ll run through the configuration process to adjust these values in the management interface. If you want to know more, take a look at the script’s documentation.
Although we won’t be using it in this article, be sure to take note of the WebAdmin password the script prints when it is finished.
Next, go to your server’s WHM interface and select LiteSpeed Web Server in the Plugin menu. You may see a couple of warnings, which we’ll fix next.
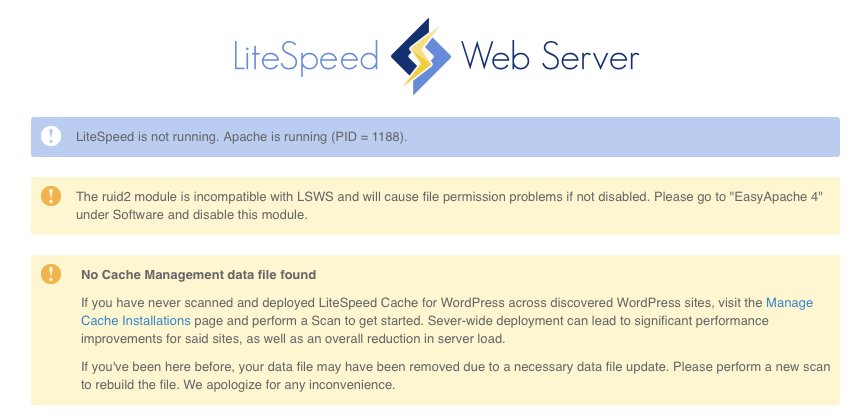
First, we have to disable the ruid2 Apache module. This module allows Apache to run as different users, but it is not compatible with LiteSpeed.
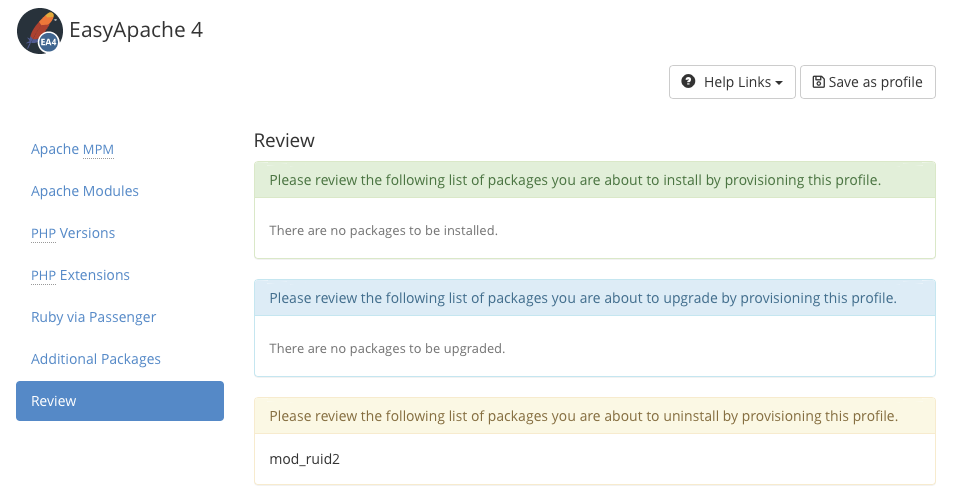
Select EasyApache in the Software menu and click Customize in Currently Installed Packages. Select Apache Modules, search for “ruid,” and ensure that the switch is off.

Click the Review Tab and then the Provision button at the bottom of the page. When you navigate back to the LiteSpeed settings, the ruid2 module warning should be gone.
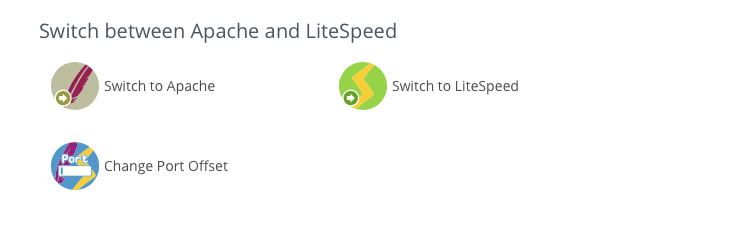
Next, we’re going to activate the new web server. You can run it and Apache in parallel on different ports, but we’ll deactivate Apache and replace it with LiteSpeed.
Select Switch to LiteSpeed in the plugin interface.
When you confirm on the next page, cPanel stops Apache and starts the LiteSpeed Web Server.
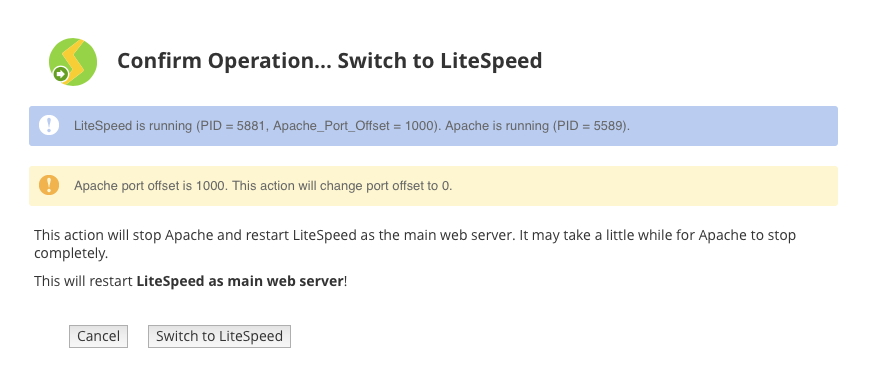
That’s it! Your cPanel server now uses LiteSpeed as its primary web server, and you can take advantage of a variety of useful features, including QUIC support, one-click switching between LS and Apache, and integrated caching, which we’ll set up in the next section.
How to Set Up LiteSpeed Cache on cPanel
One of the biggest benefits of LiteSpeed is a built-in full-page caching system called LSCache, which you can use with a wide variety of content management systems and eCommerce applications.
You will need an additional license for some LSCache features, but WordPress caching works out of the box, so that’s what we’ll focus on.
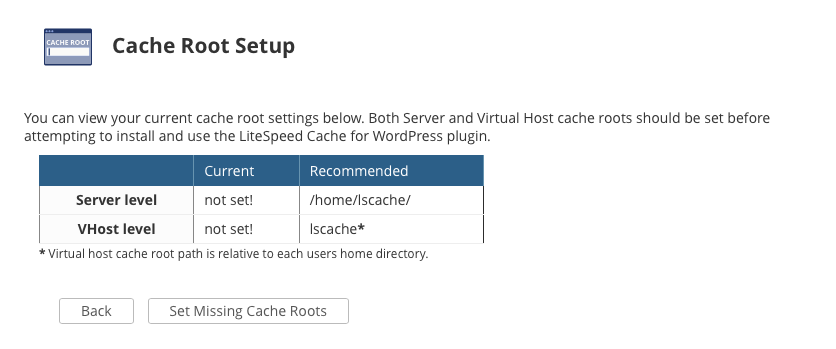
First, we need to create folders on the filesystem for the cache to store data. The installation script could have done this for us, but it’s just as easy to do it WHM.
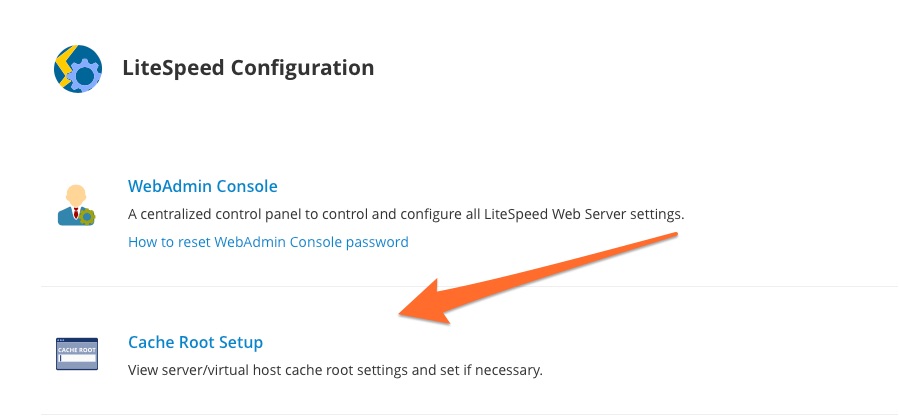
Select LiteSpeed Configuration and then Cache Root Setup.
When you click Set Missing Cache Roots, cPanel creates the cache root folders for the server and for virtual hosts.
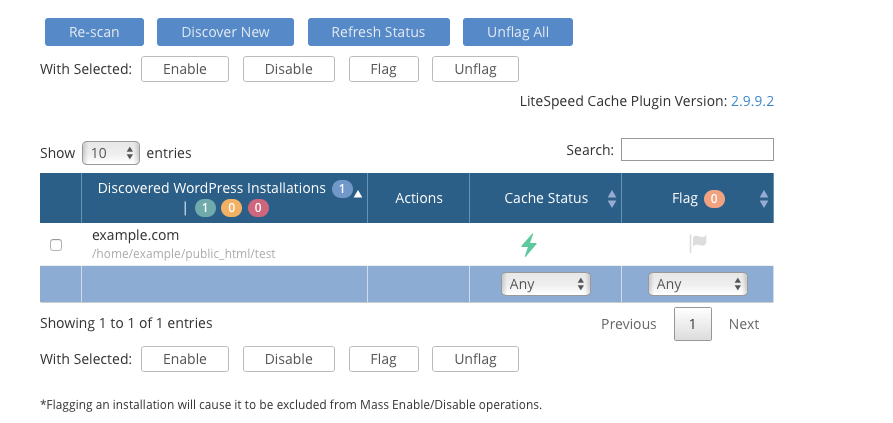
Go back to the plugin page, and select Manage Cache Installations. Hit the Scan button and cPanel searches for WordPress sites installed on the server. Once the list of sites is populated, activate caching on individual sites by clicking the “on” button in the table’s Actions column.
If you would like to use the caching feature with applications such as Magento, Joomla, and Laravel, check out the LSCache plugin store.
The Apache web server is the right choice for most users. It strikes the ideal balance of configurability, extensibility, and flexibility. However, LiteSpeed is an excellent alternative for server administrators who want to combine cPanel & WHM with a very fast event-driven web server with built-in caching and other advanced features.
As always, if you have any feedback or comments, please let us know. We are here to help in the best ways we can. You’ll find us on Discord, the cPanel forums, and Reddit.
