
The internet is a hostile environment, and your web hosting servers face innumerable threats from bad actors who want to steal data and exploit server resources. CentOS is a stable and secure foundation, but it is not invulnerable. Configuration mistakes, software vulnerabilities, and poor Linux security practices can open the door to bad actors and malicious bots.
cPanel & WHM includes many Linux security tools that help server administrators to build a secure hosting environment. In this article, we’re going to look at four techniques that leverage cPanel and WHM to enhance Linux server security.
- Changing the SSH port to confuse bad bots.
- Implementing SSH keys to avoid security vulnerabilities caused by weak passwords.
- Automatically blocking brute-force attacks with cPHulk.
- Leveraging cPanel Security Advisor to mitigate common Linux security problems.
We’re focusing on server-level security, so you will need access to your server’s root account, both in WHM and on the command line via SSH.
How To Change the SSH Port in cPanel
SSH (Secure Shell) is an encrypted network protocol that keeps authentication credentials and data safe when you connect to your server’s shell. The server runs an SSH service, and a client on your local device connects to it. Communication between them is encrypted so eavesdroppers can’t see sensitive data traveling over the network.
The SSH service traditionally listens for connections on port 22, so bots target that port with brute-force attacks that attempt to guess a valid username and password. Even if users choose long and hard-to-guess passwords—which is not always the case—brute-force attacks can generate a vast number of failed login attempts that waste server resources.
Changing the port number confuses unsophisticated bots. If they can’t find the port, they can’t attempt to log in. A Linux server has 65535 (27) available ports. You should avoid 0–1023—the so-called well-known ports, including SSH’s 22—but you are free to choose between 1024–65535.
Before you begin, be sure to configure your firewall to allow connections on the new port. Otherwise, it will block SSH connections, and you won’t be able to log in.
Log in as root with SSH and open the /etc/ssh/sshd_config file in your preferred text editor.
nano /etc/ssh/sshd_configFind the line that reads:
#Port 22Delete the pound sign at the beginning of the line and change the 22 to your new port.
Port 32356Save and close the SSH configuration file. Finally, restart the SSH service:
/scripts/restart_ssh
Be sure to take note of the port number you chose. Next time you log in to SSH, specify the port in your SSH command:
ssh -p 32356 user@example.comHow To Use SSH Keys with the Root Account
Changing the SSH port reduces brute-force log-in attempts, but it won’t stop a motivated attacker. Another way to improve SSH security avoids passwords in favor of SSH keys. SSH keys are more secure and, if password logins are disabled, they make successful brute-force attacks impossible.
SSH keys have a public and a private component. The public key is stored on the server, and the private key is stored on the client machine. Only users with the private key can log in to the relevant account. We’ll focus on securing the root account with SSH keys, but site administrators and resellers can use a similar approach in cPanel.
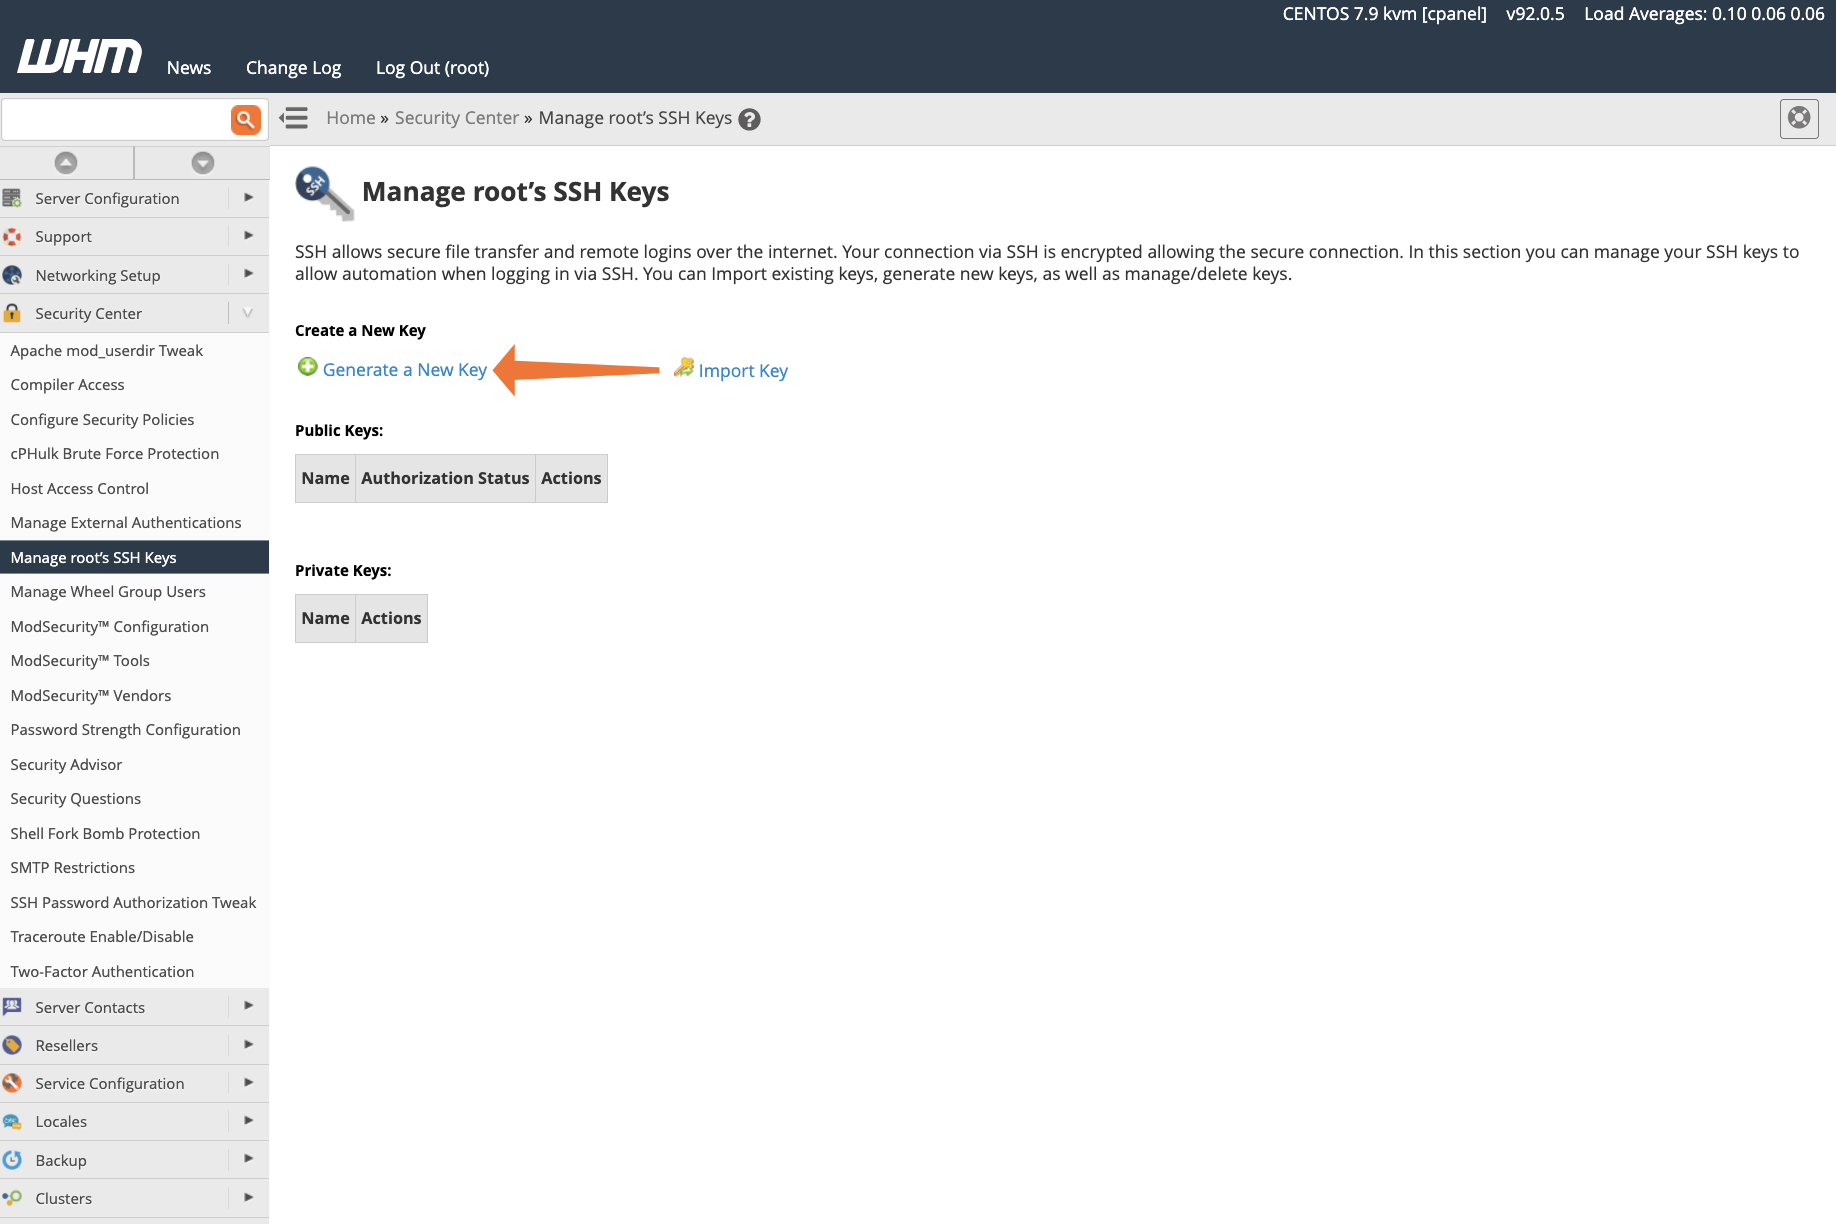
First, we’ll generate new SSH keys for root in WHM. Log in to WHM and navigate to Manage Root’s SSH Keys.
- Click Generate New Key.
- Complete the form with a strong password. In most cases, the default settings are fine.
- Click Generate key
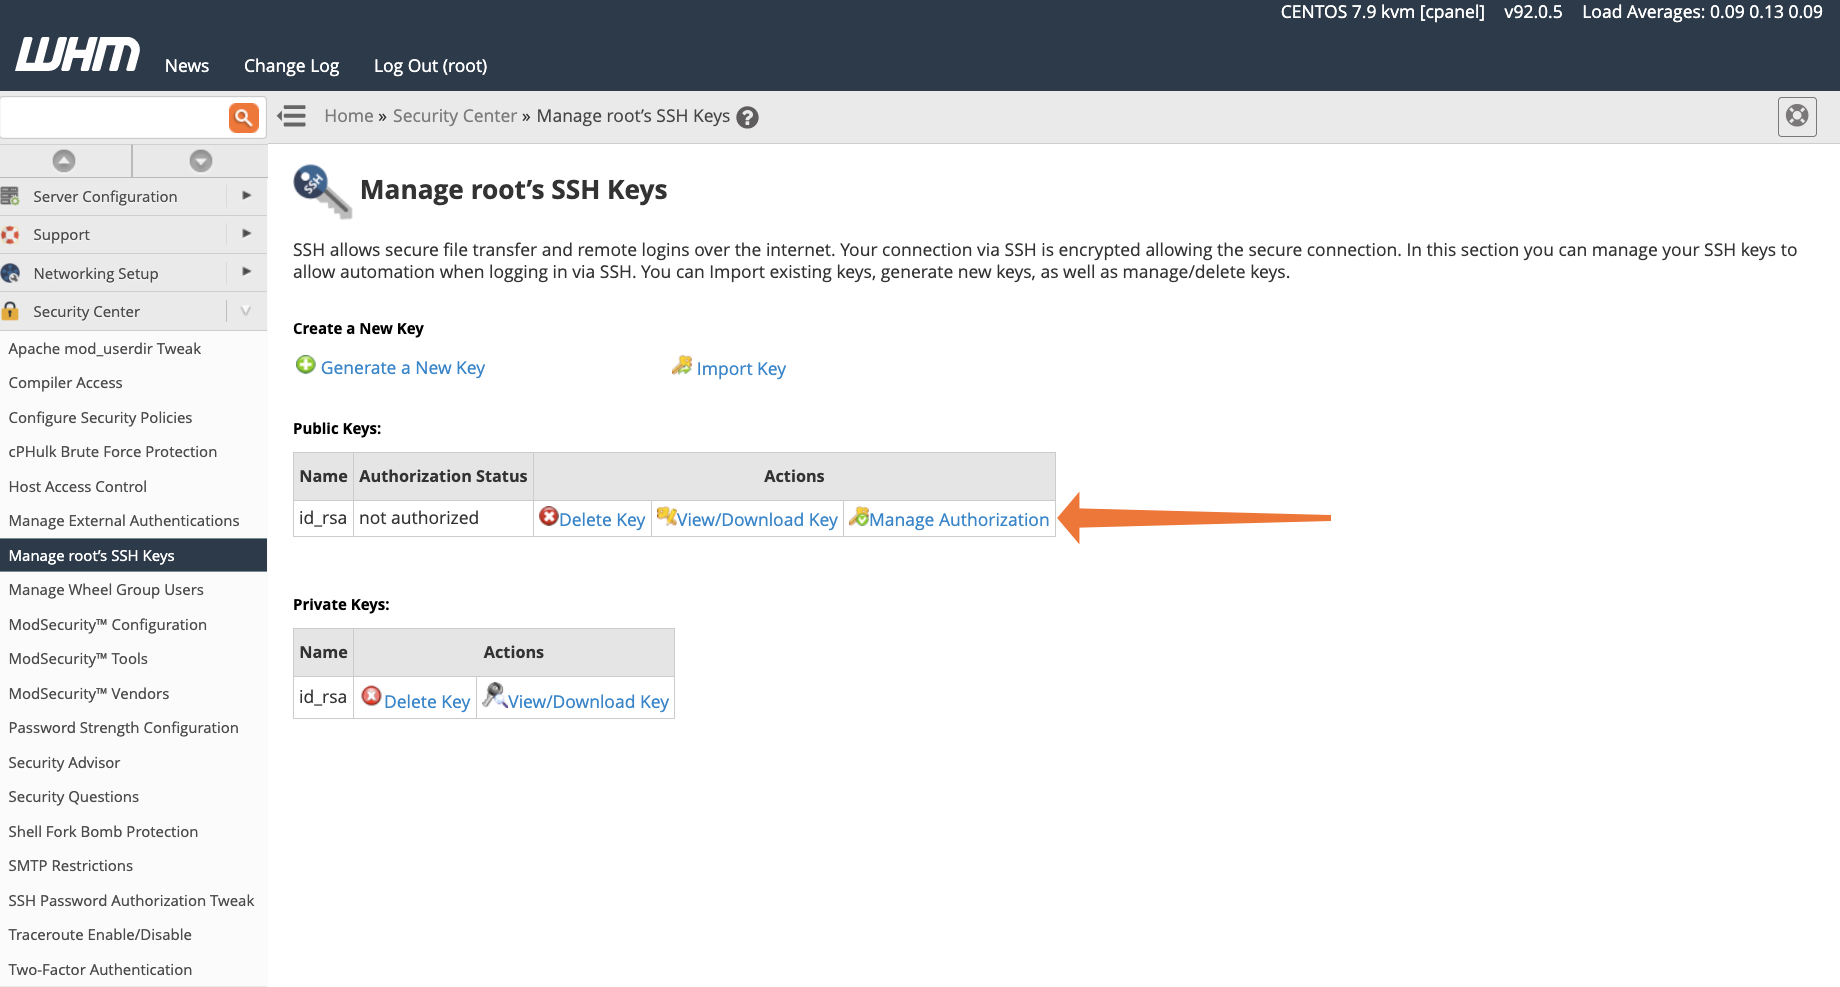
WHM generates the public and private keys, which you can see by clicking Return to SSH Manager. Next, we need to authorize the public key for authentication. Click Manage Authorization and then Authorize.
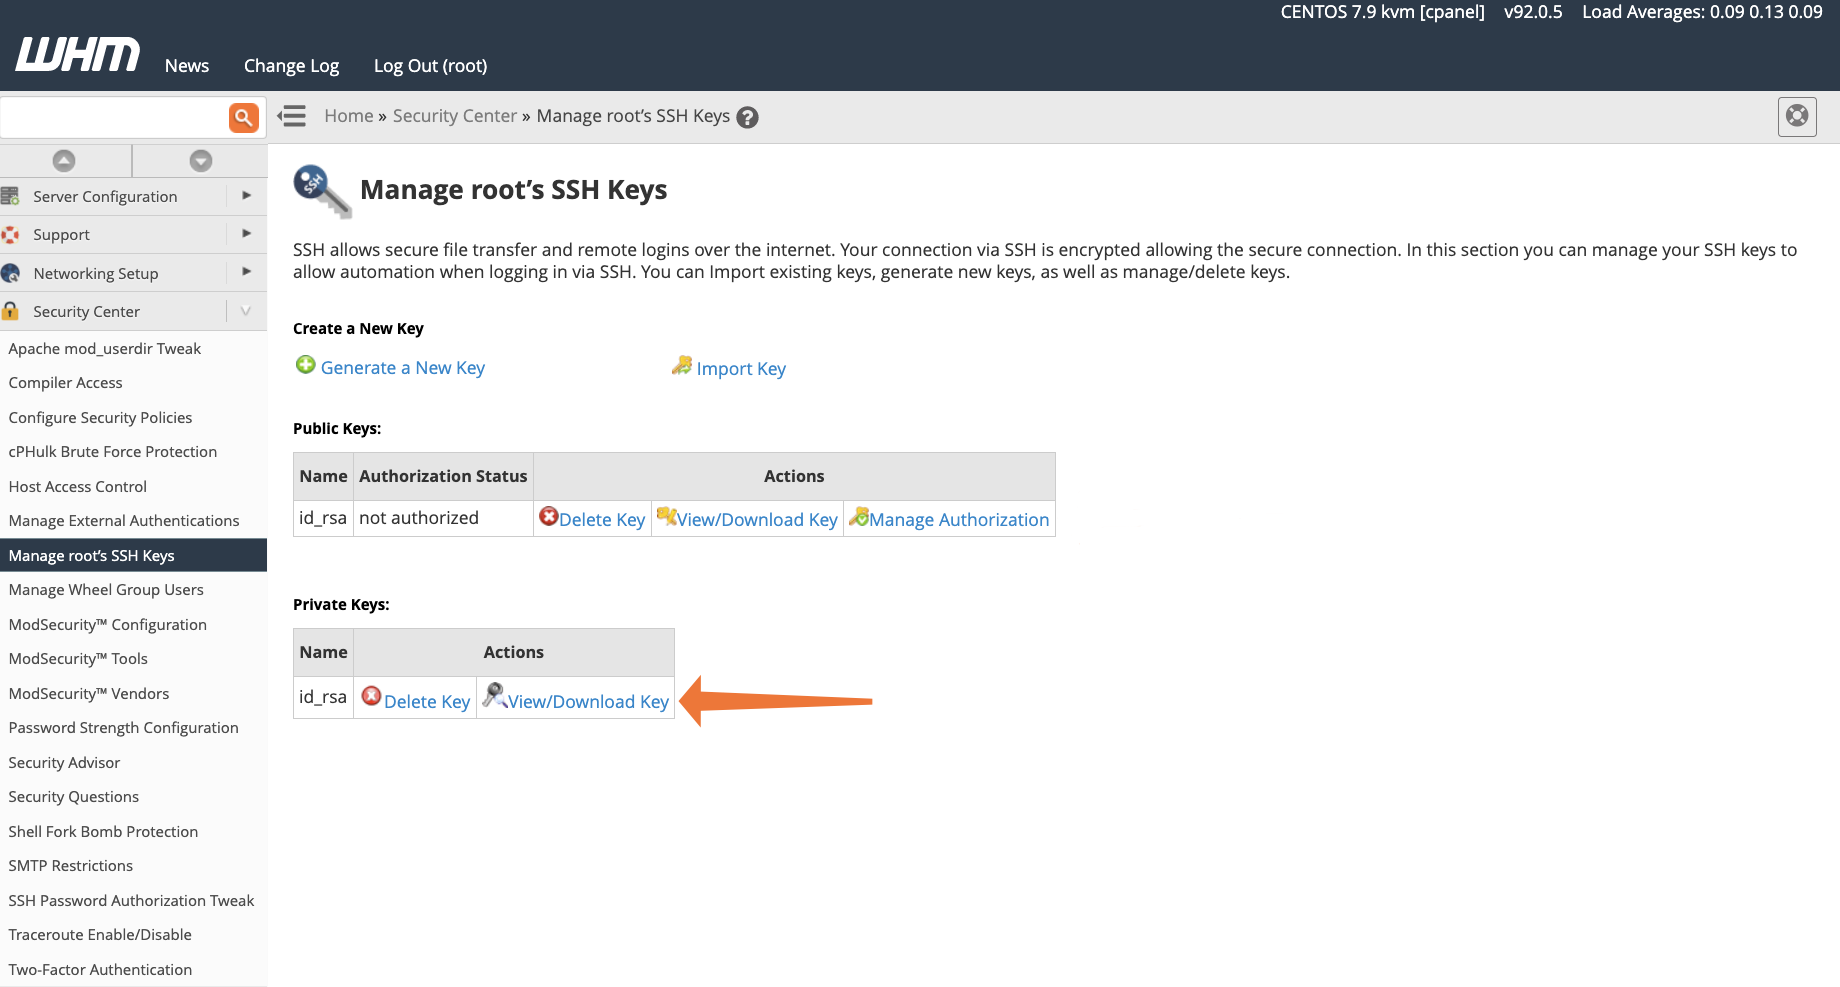
Finally, the private key should be downloaded and saved to your local computer. Click View/Download Key. Copy the text from the upper text box, or, if you use the PuTTY client on Windows, the PuTTY PPK format converter.
The next step differs depending on your operating system and SSH client. If you use the built-in Microsoft Windows 10 SSH client or OpenSSH on macOS or Linux, you should create a file called id_rsa.pub and paste the private key data into it. If you gave the key a different name, you can use it instead of id_rsa in the filename.
To make it your default private key:
- On Windows, save it in the \Users\user1\.ssh directory.
- On Linux and macOS, save it in the /home/user1/.ssh directory.
Replace “user1” with your username. You should now be able to connect to your server over SSH as usual, authenticating with the key rather than your password.
If you do not want to make it your default private key, save it elsewhere and specify the key when logging in.
ssh -p 32356 -i my_public_key user1@example.comAs things stand, the root user can log in with SSH keys or a password. If you would like to force users to authenticate with keys and prevent them from using a password, enable the SSH Password Authorization Tweak in Security Center.

Fighting Brute Force attacks with cPHulk
We’ve locked down SSH, but there are several other services bots might target. Plus, they’ll keep trying regardless of whether there is any chance of success. That’s why cPanel & WHM includes cPHulk, a sophisticated brute force protection tool that monitors the cPanel, WHM, Mail, FTP, and SSH ports.You will find cPHulk in the WHM Security Center. If it is disabled, click the switch to enable it and access the configuration interface.
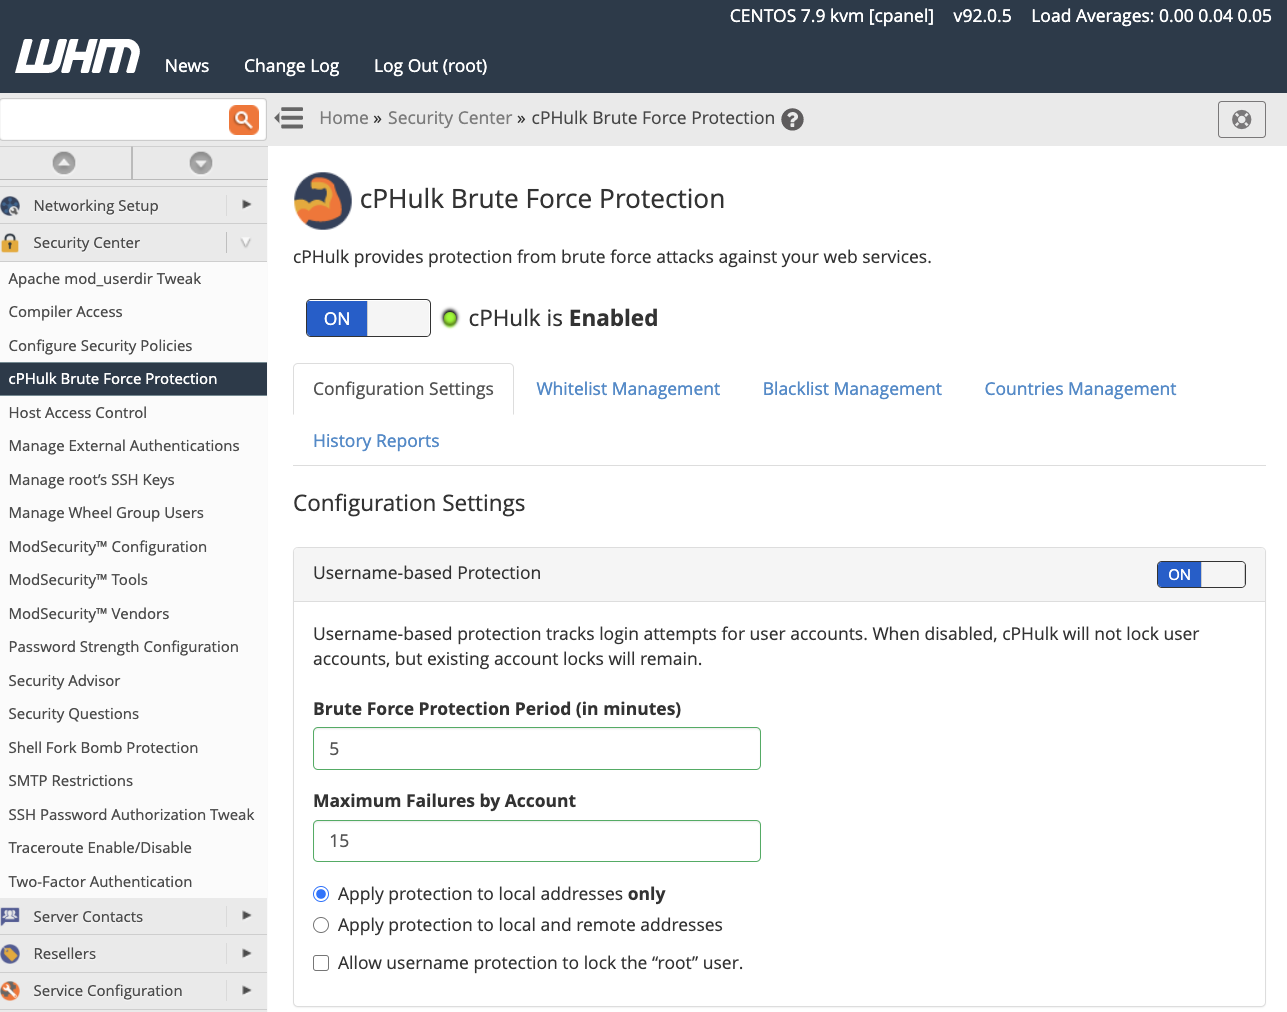
We have selected sensible defaults, but you can tweak several settings for user and IP brute-force monitoring:
- Maximum failures determines the number of failed authentication attempts before the user or IP is blocked.
- Brute Force Protection Period determines how quickly the maximum failure rate is reached.
For example, in this image, IPs are blocked if they make more than five failed login attempts in 15 minutes.
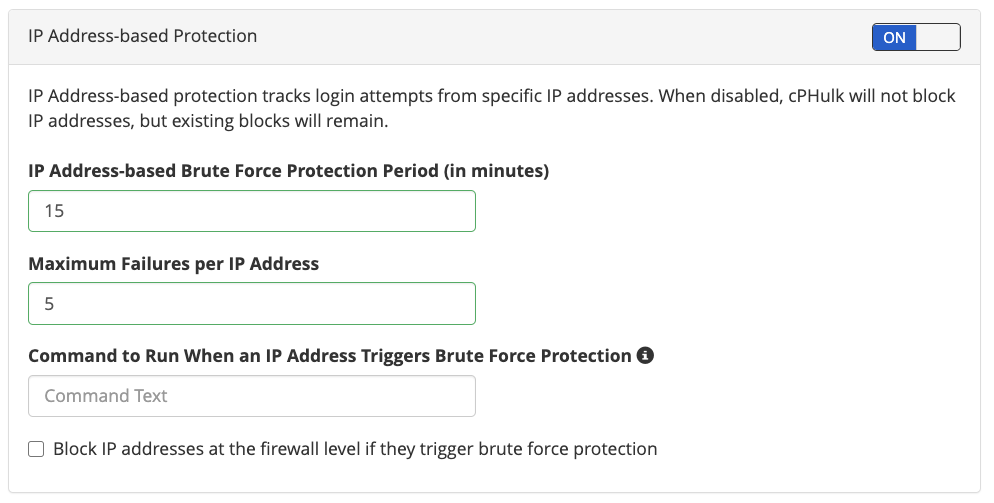
cPHulk also includes whitelisting for IP addresses and users that should never be blocked and blacklisting for those that should always be blocked. (Note that these terms are likely to change in the future to make them more inclusive.)
Follow Linux Security Best Practices with cPanel Security Advisor
cPanel Security Advisor scans Linux servers and services for misconfigurations that could cause security vulnerabilities. It generates warnings alongside recommendations with guidance to help administrators to secure their server.
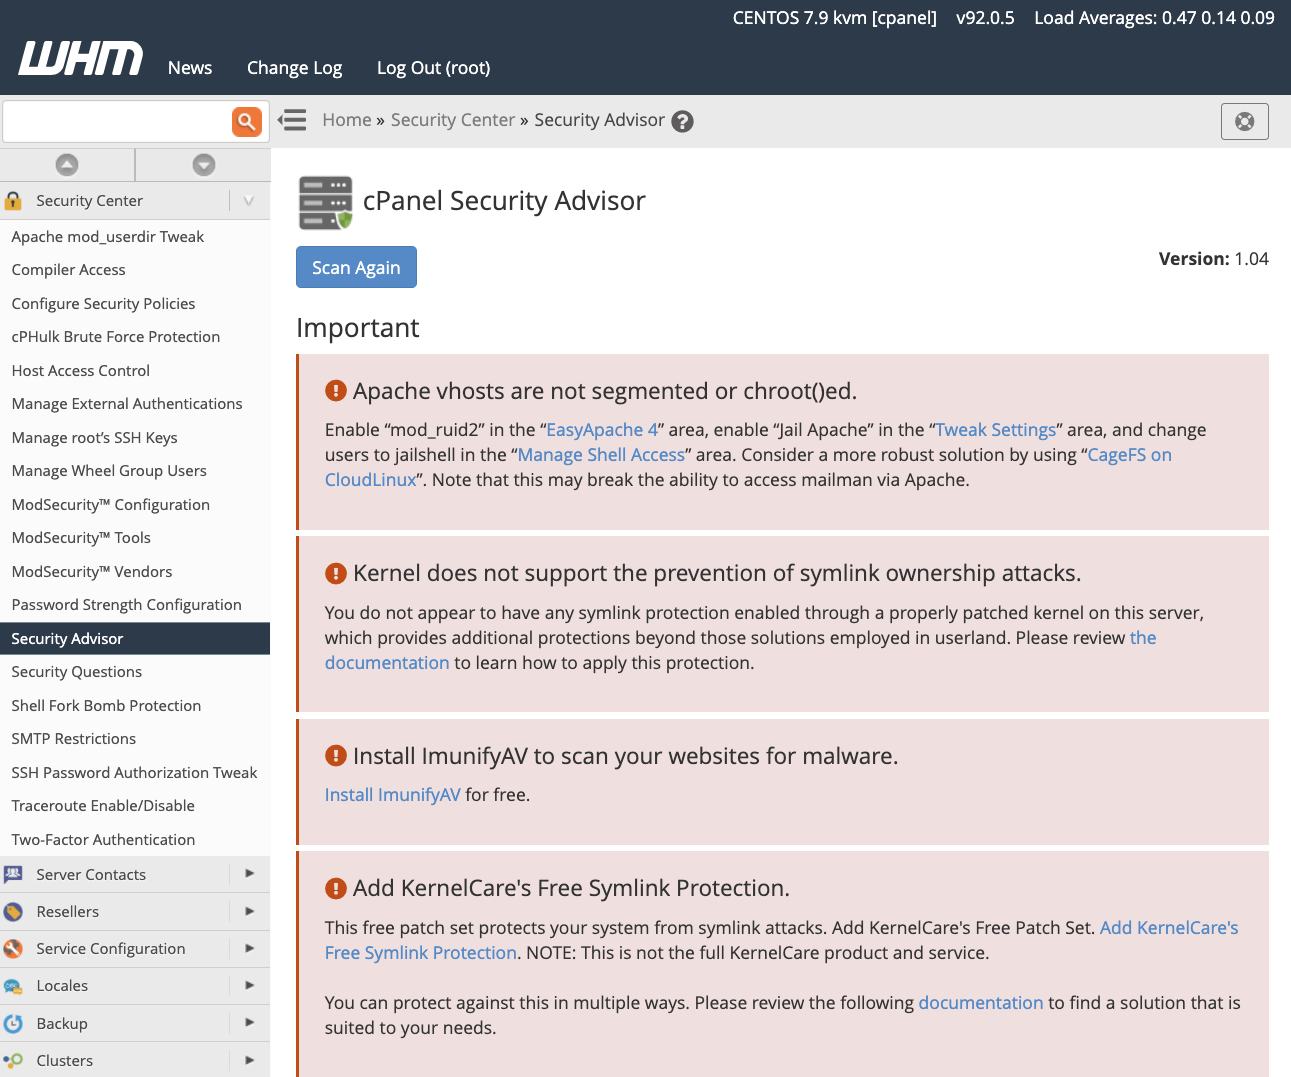
In this image, we see several important security advisories pertaining to Apache, the Linux kernel, and malware scanning. These are severe security issues that should be addressed immediately.
Other types of advisory include yellow Recommendations, which offer helpful guidance about critical security risks that should be investigated and resolved as soon as possible. Grey Information advisories display information about potential user-related security issues relating to file permissions and data access, as well as third-party software to enhance Linux server security. Green advisories indicate potential security issues that have already been resolved.
Linux Server Security with cPanel & WHM
cPanel & WHM includes dozens of Linux security features that empower hosting providers and server administrators to protect user data, limit the impact of malicious users, and defeat brute-force and other bad bot attacks. You can find more information in our Security Center documentation and the following articles:
- Malware Scanners for cPanel: Keeping Your Server Safe
- How To Survive a DDoS Attack
- How To Install and Configure ModSecurity™ In cPanel
- How to Configure and Use Two-Factor Authentication in cPanel
As always, if you have any feedback or comments, please let us know. We are here to help in the best ways we can. You’ll find us on Discord, the cPanel forums, and Reddit.
