
A web server managed by cPanel & WHM has many responsibilities, but its most important job is serving web pages in response to HTTP requests, a process that depends on the correct configuration of domain names and IP addresses. Manually configuring IPs and domains is incredibly complicated, but cPanel & WHM’s web interface makes light work of everyday web server administration tasks.
In this article, we’re going to explore four aspects of IP and domain name management:
- Adding a new IP address and redirecting it to a domain.
- Adding a new domain in cPanel.
- Configuring domain redirects in cPanel.
- Configuring domain forwarding in WHM.
To finish off, we’ll show you how to flush operating system DNS caches, solving a problem that frustrates many users when they change IP and domain configurations.
How to Redirect a New IP to a Domain in cPanel
There are several reasons you might add a new IP address to your server. You may want to give a cPanel user or reseller a static IP address or allow a site to operate from a dedicated address.
To add an IP address to a web server, you need:
- Access to its root account; we’ll be working in WHM.
- A new IP address from your hosting provider. They will set up their network to associate the IP with the server.
First, we’re going to let cPanel & WHM know about the IP address so it can configure the server and make the IP available for use with websites and other services.
Navigate to Add a New IP Address under IP Functions in the WHM sidebar menu.
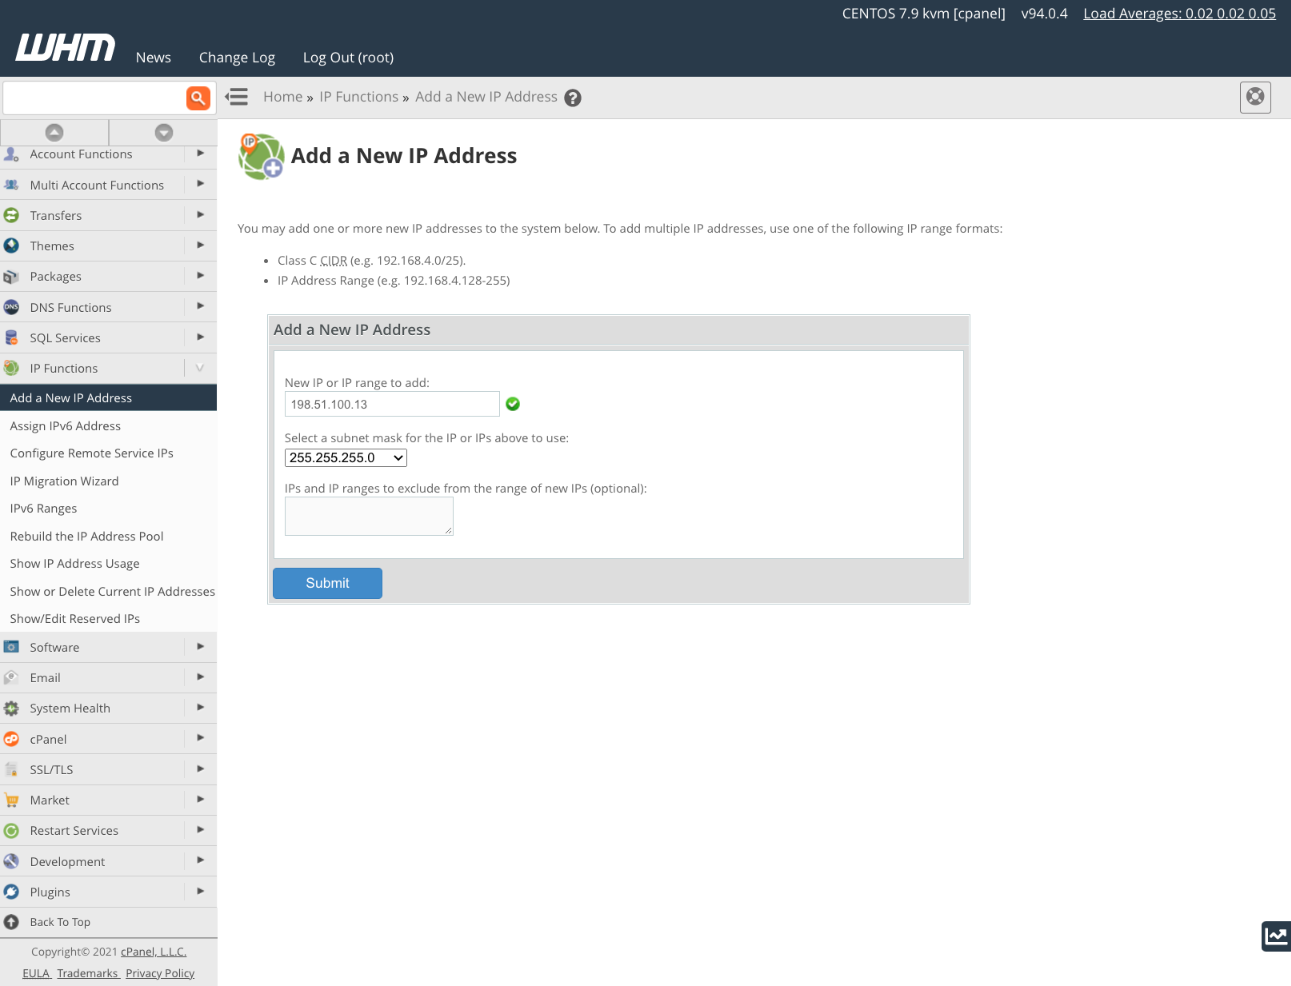
Enter the new IP address and a subnet mask. If you don’t know which subnet mask to enter, ask your hosting provider. The mask indicates which part of the address is used for the network and which part for devices on that network. It differs depending on the host’s configuration, but every IP on your server should use the same subnet mask.
Click Submit to finish. If you make a mistake, you can delete the new address in Show or Delete Current IP Addresses.
Now the address is added, you can associate it with hosting and reseller accounts or individual websites. We’ll show you how to change an existing site’s IP address to the new one.
Open the List Accounts page from the Account Information submenu. Choose the account associated with the domain you want to change and click the “+” next to the domain.
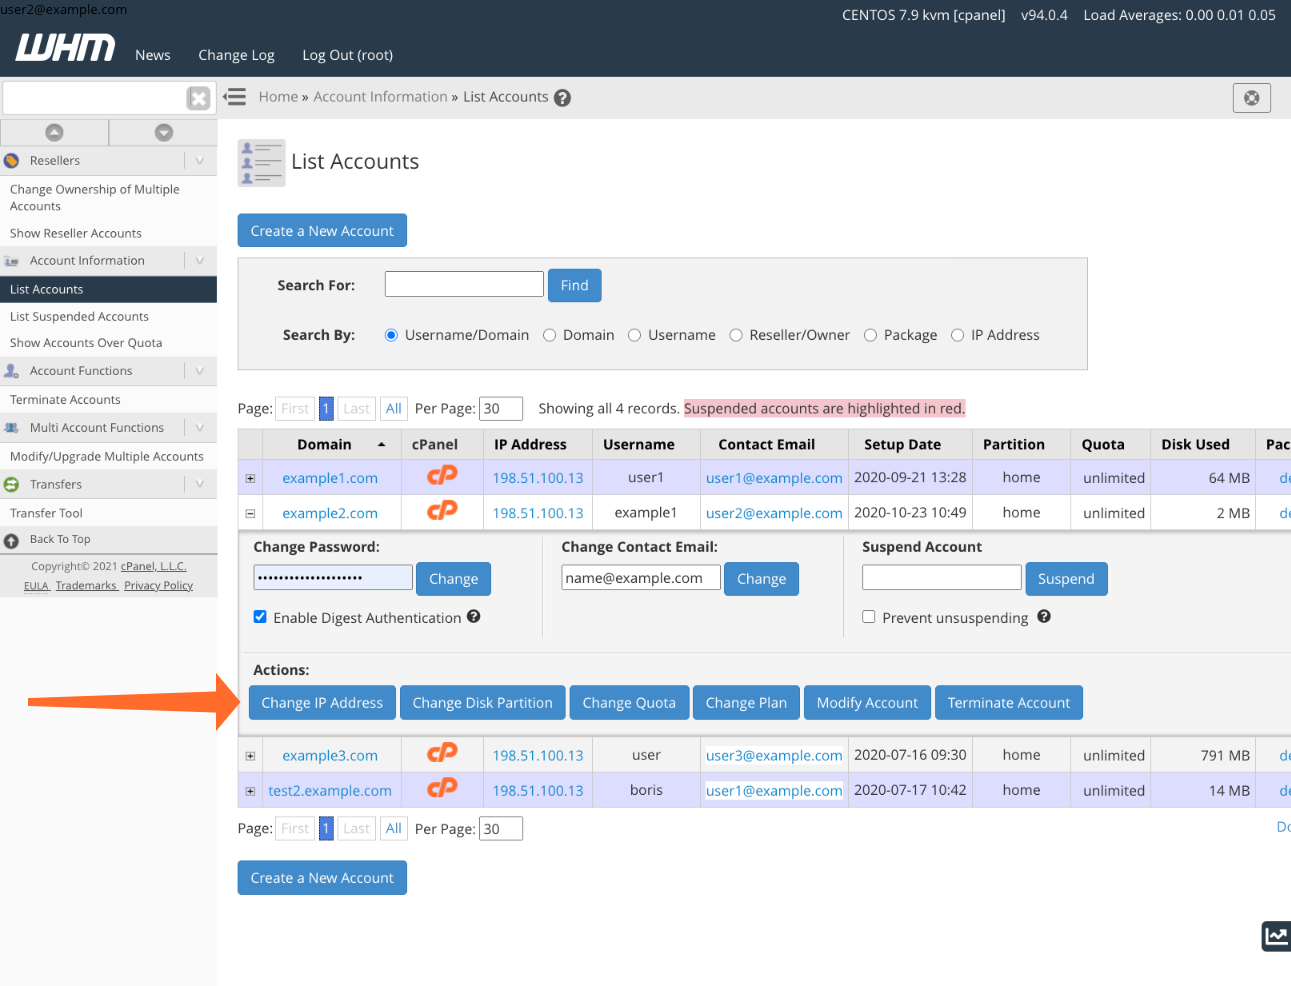
Click the Change IP Address button, and then select the IP we just added from the drop-down menu.
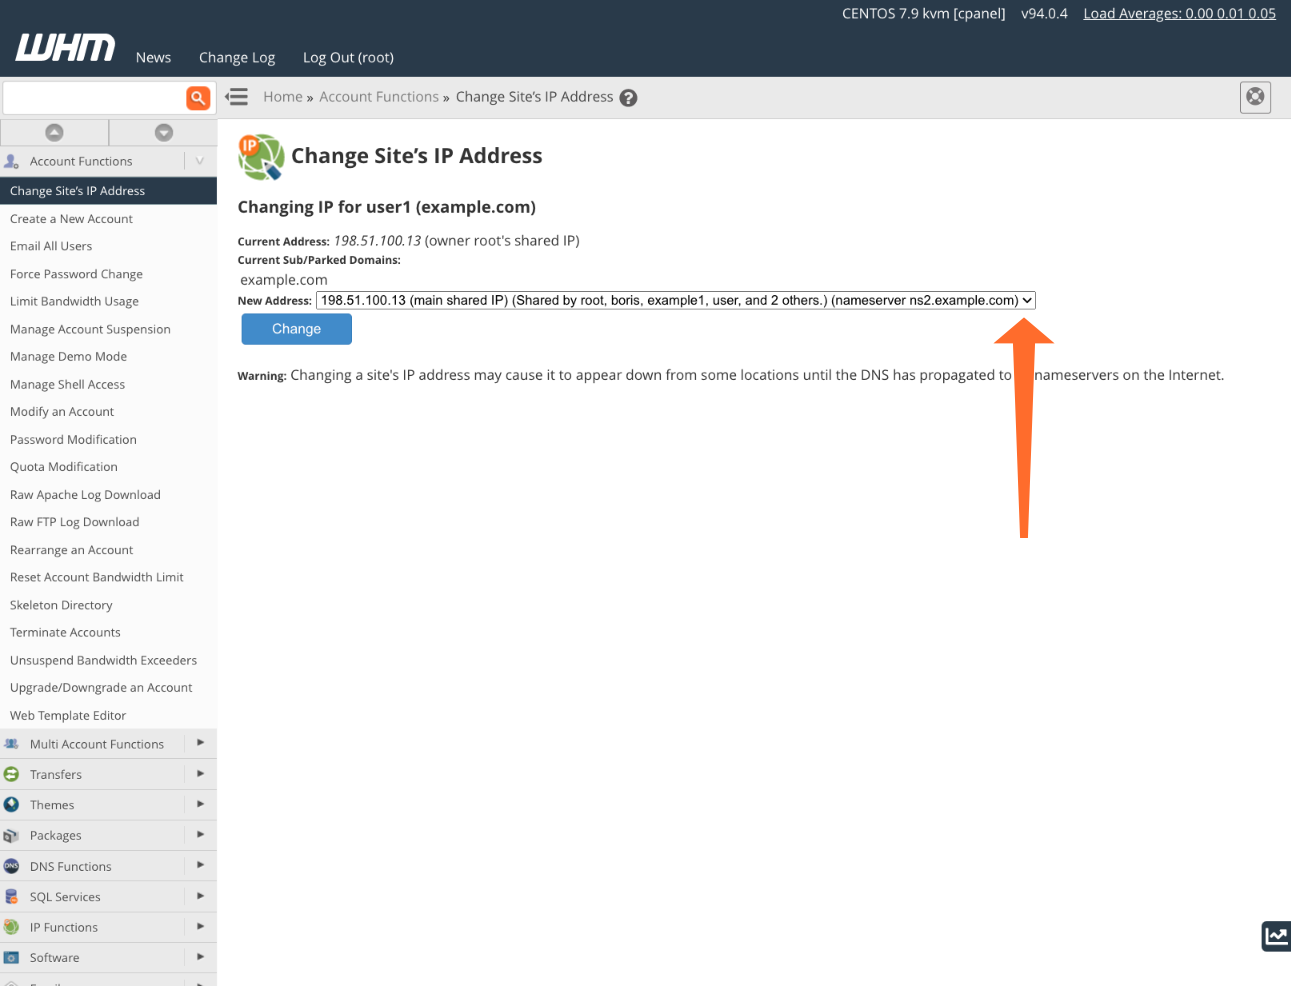
Changing the site’s IP will make it unavailable at its old IP, and should expect it to appear offline for some time.
How to Add a New Domain to cPanel
Adding a new domain is a more common task than adding an IP address, so let’s look at how you can do it in less than a minute with cPanel. We’re assuming you have already purchased your domain from a registrar and that your account’s DNS servers are correctly configured. You can learn more about DNS server configuration in How to Configure DNS Nameservers with cPanel and The DNS Zone For Beginners.
First, open the Domains page in cPanel.

Click Create a New Domain.
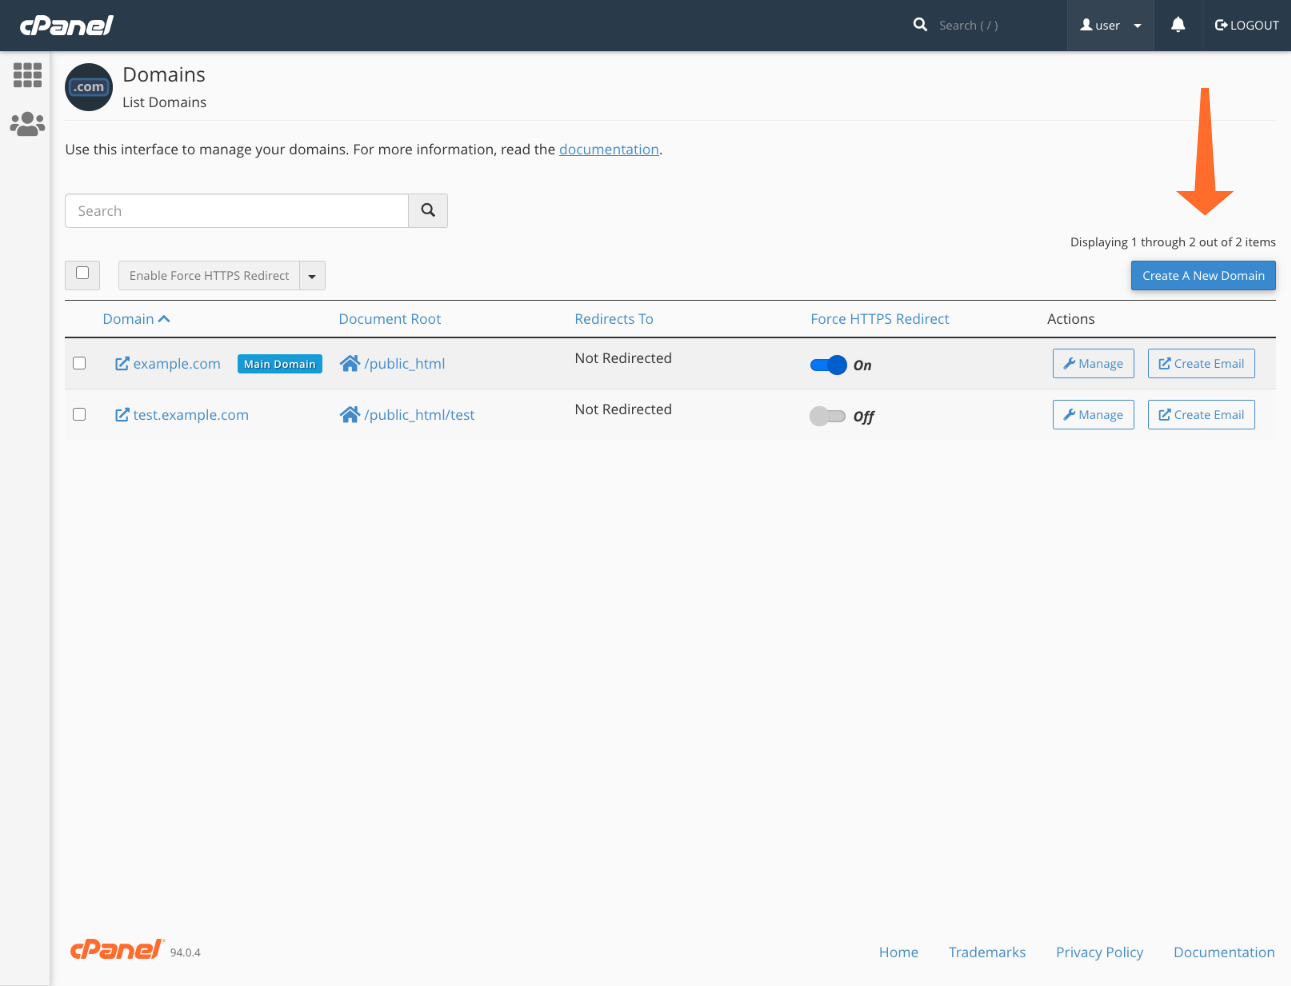
Enter the domain name and a document root for the site’s files. The default document root is shared between this domain and the account’s main domain, but you can choose any other directory under your home directory.
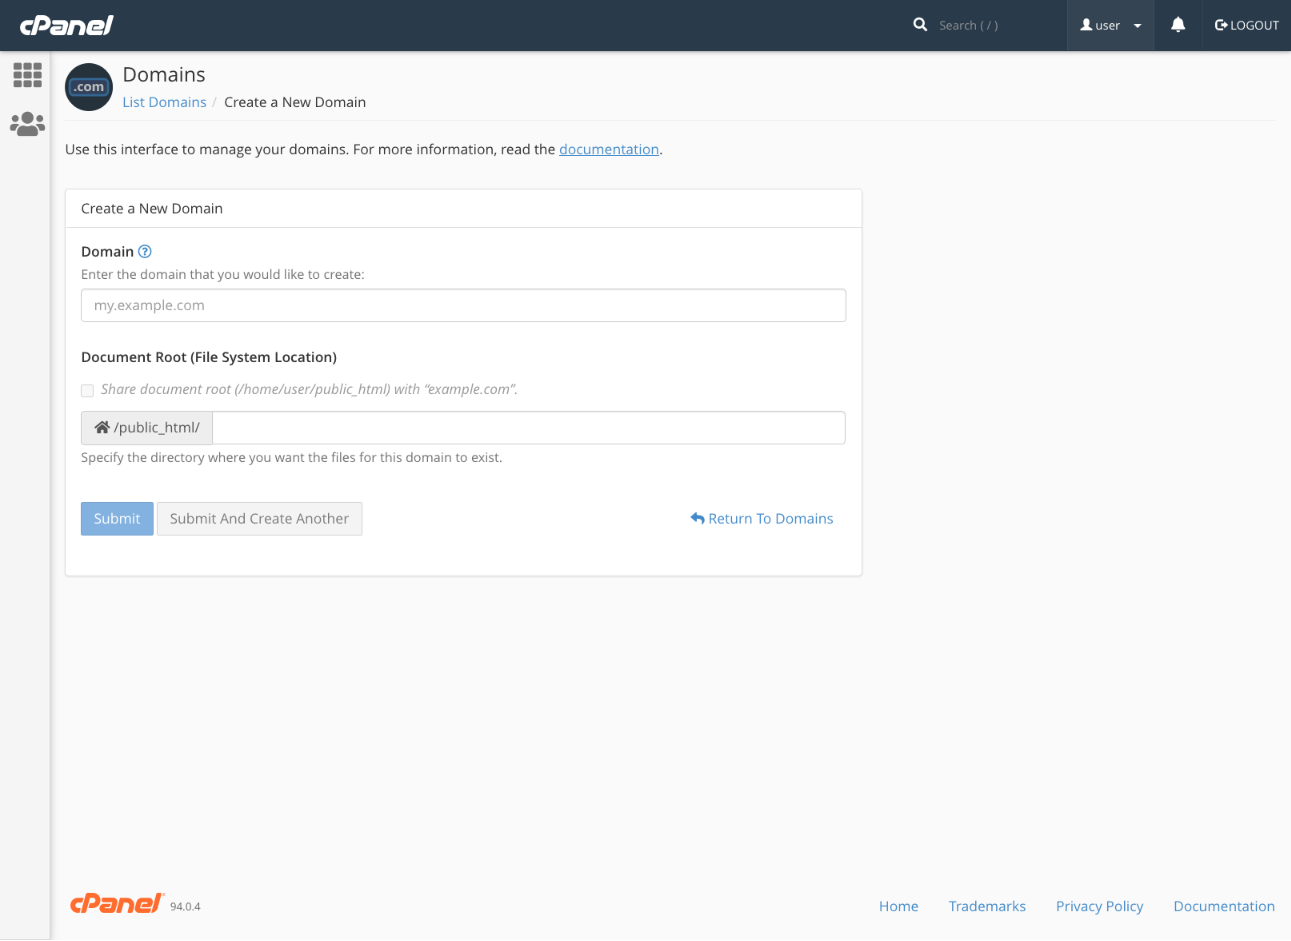
Click Submit, and you’re done! You can now go ahead and create your new site.
Configuring Domain Redirects in cPanel & WHM
We’ve explored redirecting IPs to domains and adding new domains, but what if you want to redirect one domain to another? This is a frequent request when, for example, a brand changes its domain but doesn’t want its old links to break.
Domain Redirect Codes Explained
Before we get to configuring redirects, it’s helpful to understand the two main types and their impact on browsers and search engines. When a web client requests a redirected page, the server sends a response that includes the page’s new URL and an HTTP status code.
There are dozens of status codes, but we’re interested in those beginning with “3” because they indicate redirection. Although there are several 3xx codes, most of the time, you’ll choose either 301 or 302.
- A 301 redirect means the page has moved permanently. It prompts HTTP clients such as browsers and search engine crawlers to update their caches.
- A 302 redirect means “Found,” but it’s most often used to tell HTTP clients the page has moved temporarily. The page isn’t available at the old URL now, but it might be in the future, so there’s no need to update caches.
You might be wondering why “Found” is used for “Moved Temporarily,” especially when there is also a 307 Moved Temporarily code that says what it means.
There is debate in the SEO world about the relative merits of these codes, but the consensus is that 302 should be used when the URL changes temporarily; browsers and web crawlers understand it to mean that, even if it isn’t explicit. A 307 code is, for the most part, interpreted in the same way, but there are fringe cases, so it’s better to stick with 302.
How to Configure Domain Redirects in cPanel
You can redirect an entire domain or just individual pages, but we’ll focus on redirecting everyone who visits the domain.
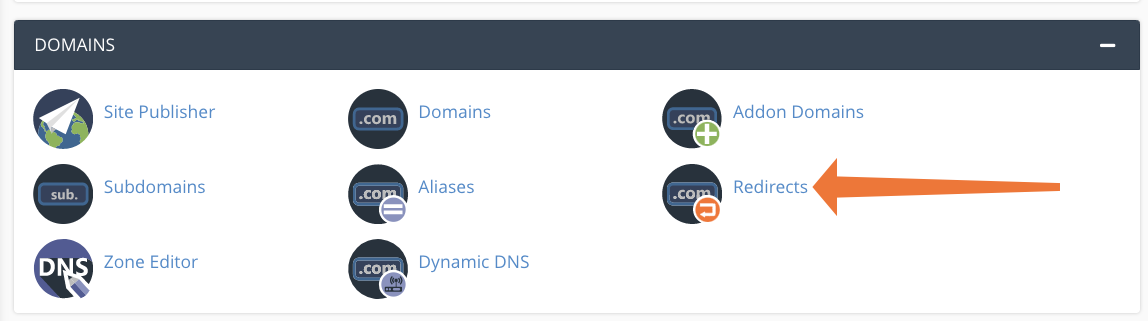
In cPanel, select Redirects from the Domains section of the main page menu.
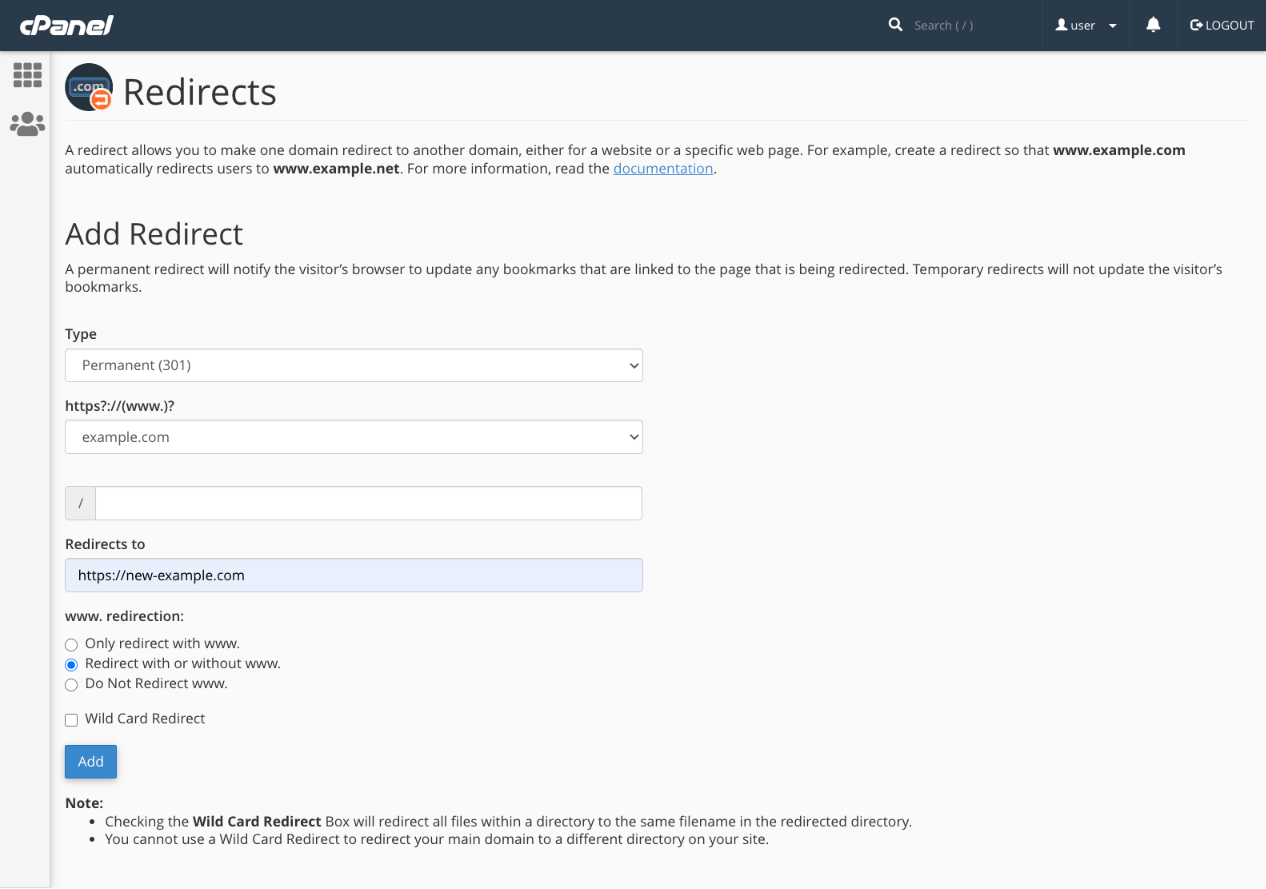
On the Redirects page, select Permanent (301) or Temporary (302) from the first dropdown menu. From the second dropdown, choose the domain you wish to redirect. If we were redirecting a page, we’d enter the path in the following field, but we can leave it blank.
Finally, add the new destination domain, including the protocol (https://), in the Redirects to field and click Add.
In the most straightforward case, that’s all you need to do, but there are also options to configure how the “www” subdomain is treated and a Wild Card Redirect option, which will redirect all of a site’s pages to the same URL.
How to Configure Domain Forwarding in WHM
In most circumstances, you should use cPanel’s domain redirection functionality to create 301 and 302 redirects, but you can also forward domains in WHM. Forwarding is often used to temporarily redirect visitors while a site undergoes maintenance, and it behaves differently from the redirects we’ve already looked at.
Whereas redirection is carried out on the client—the browser is given the information it needs to load the page—forwarding is a server-side operation; it’s invisible from the browser’s perspective because it’s handled by the server and the domain name system.
In the WHM sidebar menu, select Setup/Edit Domain Forwarding under Domain Functions. Click the Click to Create button and then the Set Up Forwarders button.
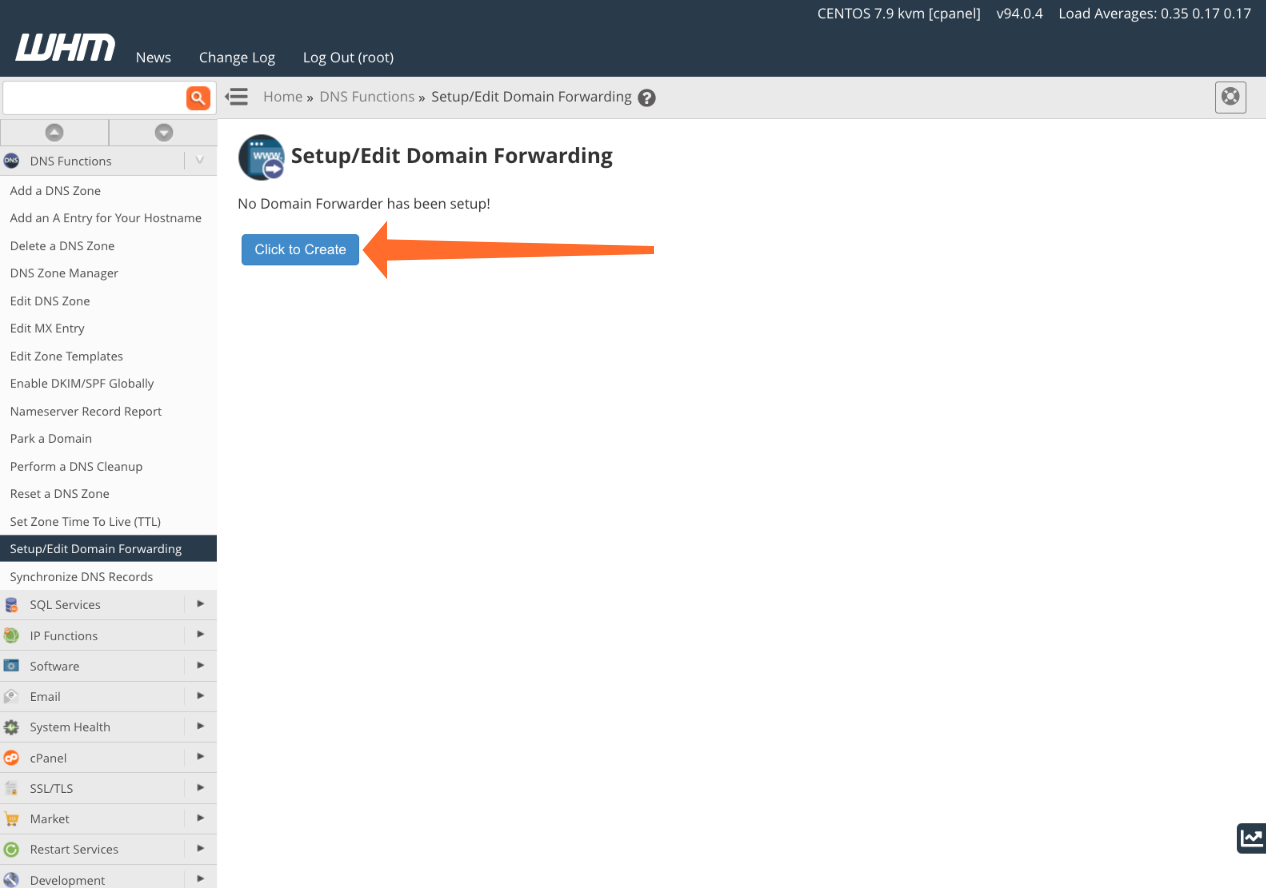
The Domain Forwarding interface is straightforward. Add the domains you would like to forward in the left column and the destination domain in the right column. When you’re done, click Save Map.
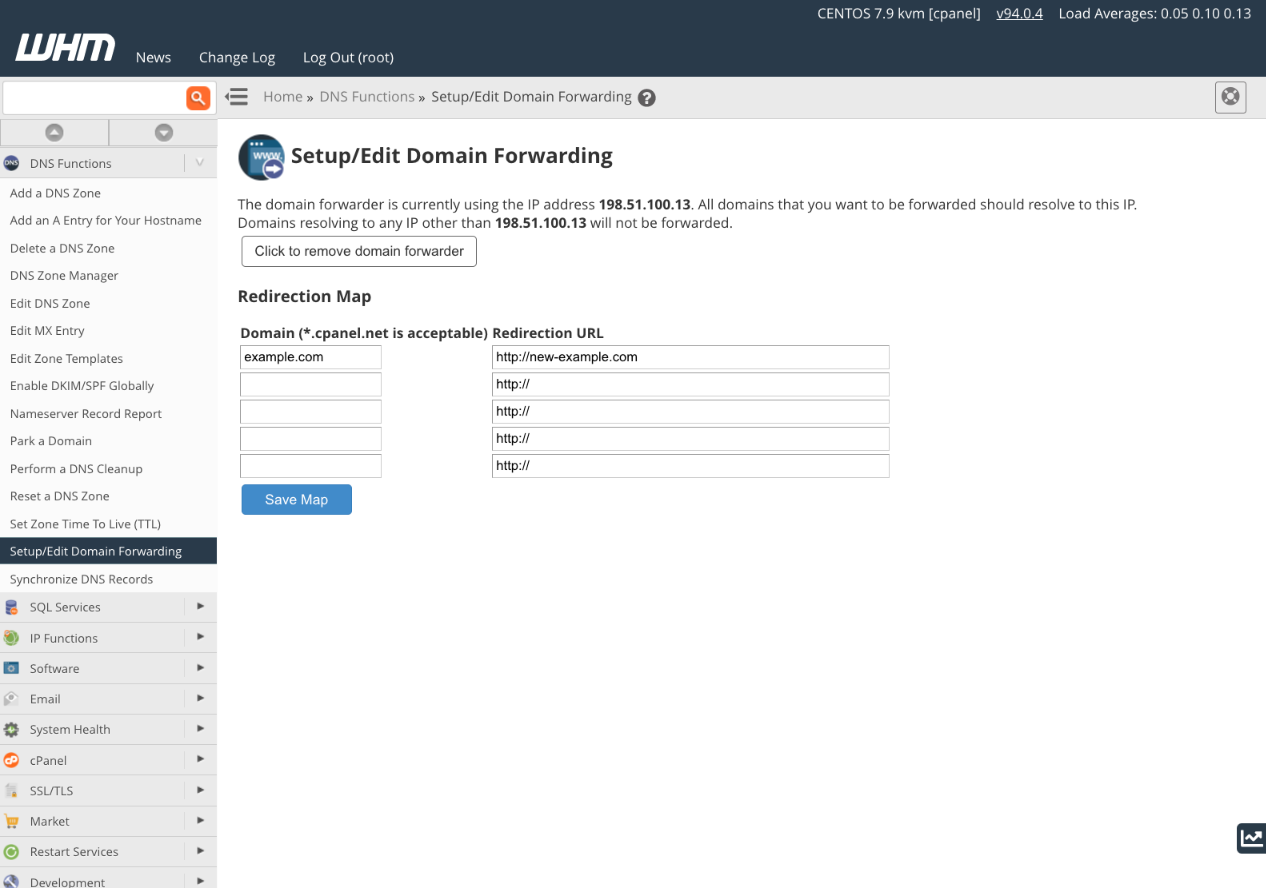
In addition to setting up the domain forwarder, you must also ensure that the domain resolves to the IP address displayed at the top of the setup page. You can make sure it does by checking and, if necessary, editing the domain’s A record. You can do this in WHM’s DNS Zone Manager, as described in our documentation, or in your domain registrar’s DNS record editor if you are using their nameservers.
How to Flush Your Operating System’s DNS Cache
When you edit domain records or change IP addresses, you may find that you can no longer access a site on the server. Instead of loading the site’s pages, you get a 404 “Not Found” error. That may be because the DNS record changes haven’t propagated, but it can also be caused by stale entries in your operating system’s DNS cache.
DNS records change infrequently, and it takes time to make a request to domain name servers. It’s often quicker to make a DNS request and cache the results for a while. That way, the domain’s IP address can be read from the cache, which is much faster than getting it from a DNS server across the internet.
However, if you make a change and the DNS record no longer matches your cache, you won’t be able to load the site. On most operating systems, it’s straightforward to clear the cache, forcing the OS to get fresh data.
Microsoft® Windows 10
Launch the command prompt by entering “cmd” in the start menu search box, right-clicking on Command Prompt, and selecting Run as Administrator. Enter the following command:
ipconfig /flushdns All being well, you’ll see the message: “Windows IP configuration successfully flushed the DNS Resolver Cache.”
macOS®
On OS X Yosemite and later, open your preferred terminal emulator or type “terminal” into Spotlight. Enter this command followed by the administrator account’s password.
sudo killall -HUP mDNSResponderOn older versions of macOS, use the following command instead:
sudo discoveryutil mdnsflushcacheCentOS
Run the following in a terminal window:
systemctl restart dnsmasq.serviceSee our documentation for information about clearing the DNS cache in other operating systems.
Straightforward Domain Management with cPanel & WHM
cPanel & WHM makes it easy to handle all aspects of IP address and domain name management, whether it’s adding new IP addresses and domains, redirecting domains, or editing zone files. We’ve only scratched the surface of what’s possible in this article; if you’d like to learn more, check out the feature overview and our comprehensive documentation.
As always, if you have any feedback or comments, please let us know. We are here to help in the best ways we can. You’ll find us on Discord, the cPanel forums, and Reddit. Be sure to also follow us on Facebook, Instagram, and Twitter.
