
Does your reseller hosting business have a brand identity that sets it apart from the competition? In a ferociously competitive hosting industry, a custom brand can help your hosting services to stand out from the crowd, which is why cPanel & WHM® makes it straightforward to customize the cPanel® interface and establish a unique visual identity.
What is Reseller Branding in cPanel?
cPanel & WHM provides features for administering web hosting servers (WHM) and managing web hosting accounts (cPanel), but we also support a third type of account: reseller hosting. Unlike standard cPanel accounts, resellers can access some WHM features, and they can create and manage cPanel accounts for other users.
Reseller accounts are great for people who want to provide web hosting services but don’t want or need a full server’s resources. With cPanel reseller hosting, the reseller rents server space from a hosting provider, then parcels it out to clients, each of whom has a cPanel account which can be customized by the reseller.
cPanel & WHM provides two user interface customization options to resellers :
- Brand customization in WHM.
- Themes that override the default theme with brand colors, text, and icons.
In this article, we’ll use both to build a unique brand for cPanel reseller hosting with custom colors, content, and icons.
What You Need to Brand Your cPanel Reseller Hosting Interface
Before we get started, you’ll need the following:
- A cPanel reseller account; we’ll be using features from both WHM and cPanel.
- An understanding of HTML and CSS, although we’ll explain what you need to know to customize themes.
- Command-line access. Most customizations can be made in cPanel & WHM, but a small number require shell access.
- Brand assets, which might include a logo, color scheme, and template content.
With that in place, let’s begin!
Reseller Brand Customization in WHM
WHM’s Customization feature allows resellers to modify key aspects of the interface. This is where you choose a company name, logo, and other branded interface elements.
Log in to WHM with your reseller account and navigate to Customization, which you will find under cPanel in the sidebar menu.
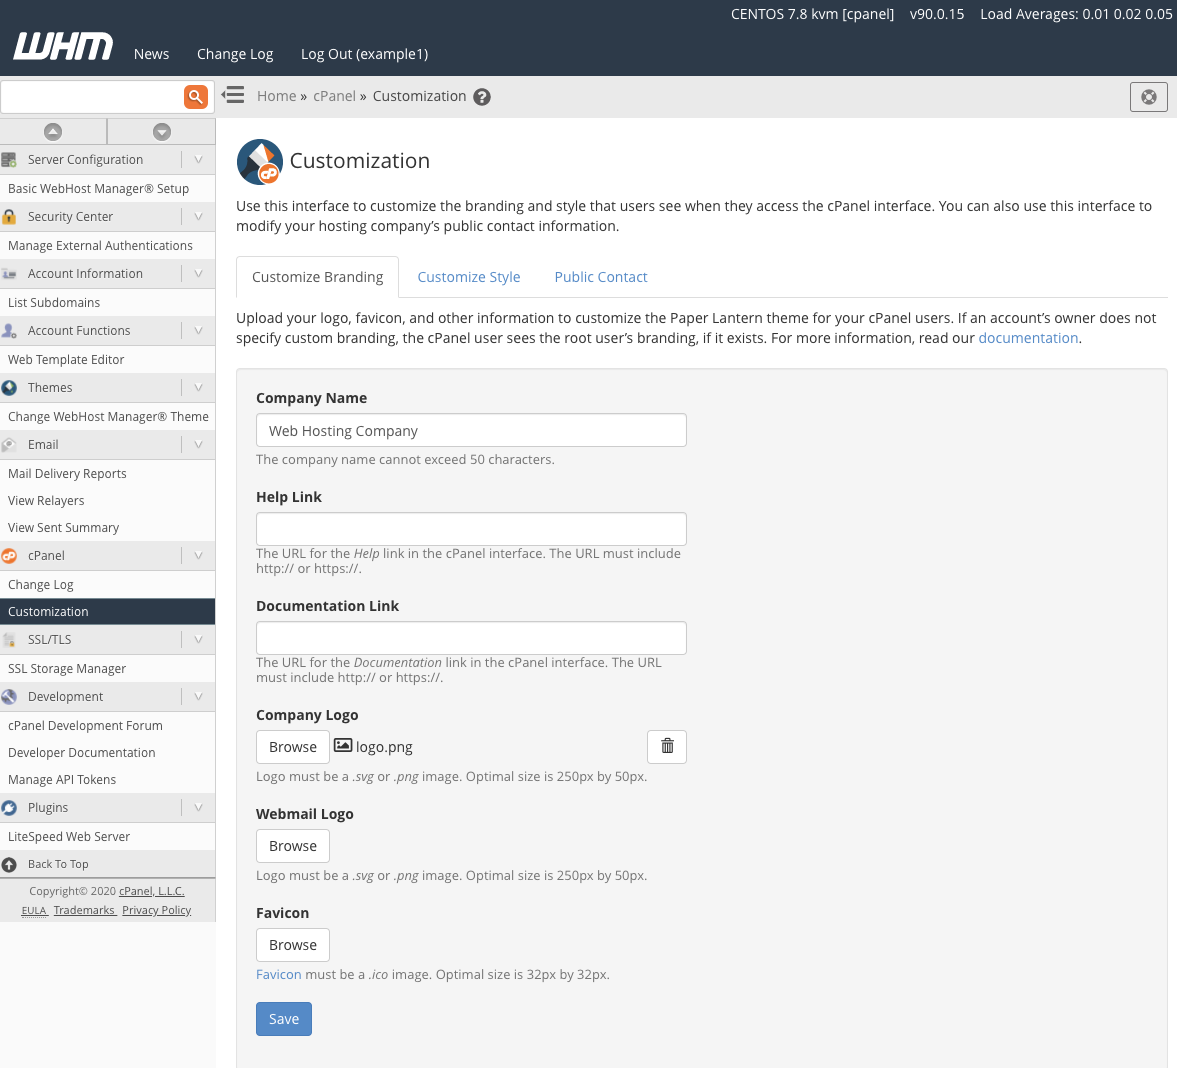
On this page, you can:
- Enter a company name, which will appear in the top left of cPanel’s navigation bar.
- Upload a company logo for the primary and webmail interfaces.
- Set a favicon, the small image in browser tabs.
You can also set links to your company’s help and documentation pages, which, by default, appear in the footer of cPanel pages.
Under each field in the form is information about the type of asset you should provide. For example, your logo should be approximately 250 px wide and 50 px high to fit cPanel’s layout. Ignoring this guidance can have an undesirable impact on the interface.
Once you have added your brand’s assets, open cPanel to see your newly-branded web hosting interface.
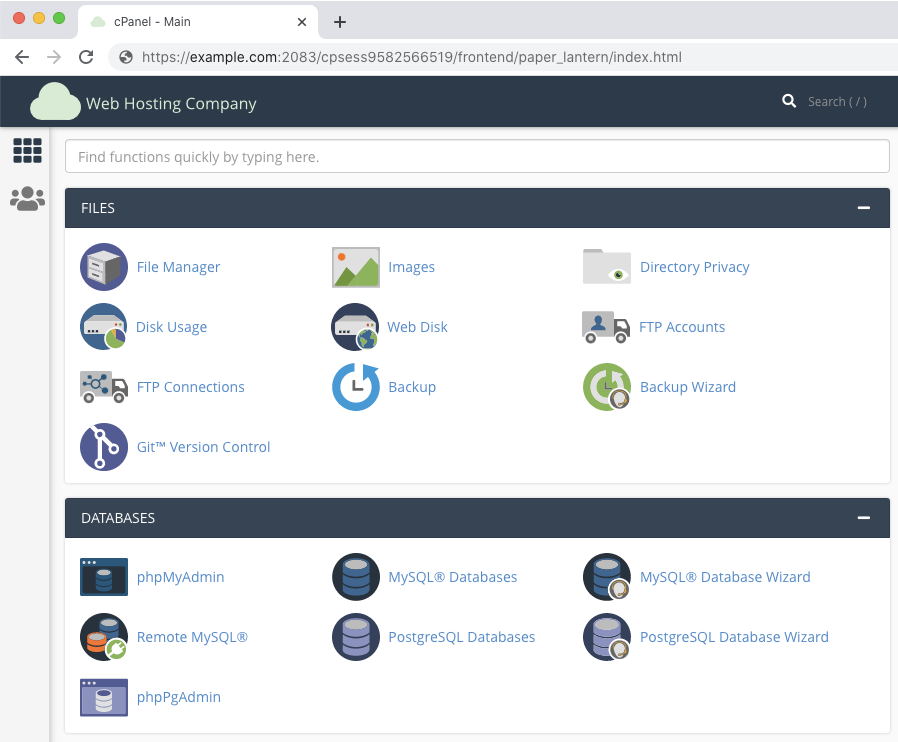
As you can see, we’ve added a new logo and a matching favicon. Customization is often all resellers need to brand client cPanel accounts, but it’s possible to change almost every design element. In the next section, we’ll show you how to create a theme and make it the default.
cPanel Reseller Hosting with a Custom Branded Theme
cPanel includes a default theme called Paper Lantern. We’re going to create a theme that overrides aspects of Paper Lantern with reseller branding. You could make a new theme from scratch, but overriding an existing one is more accessible to people who aren’t developers.
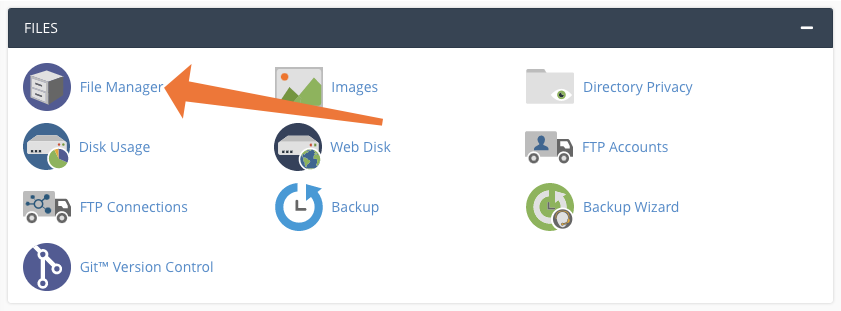
We’ll be working in the File Manager, so log in to cPanel with your reseller account and open File Manager.
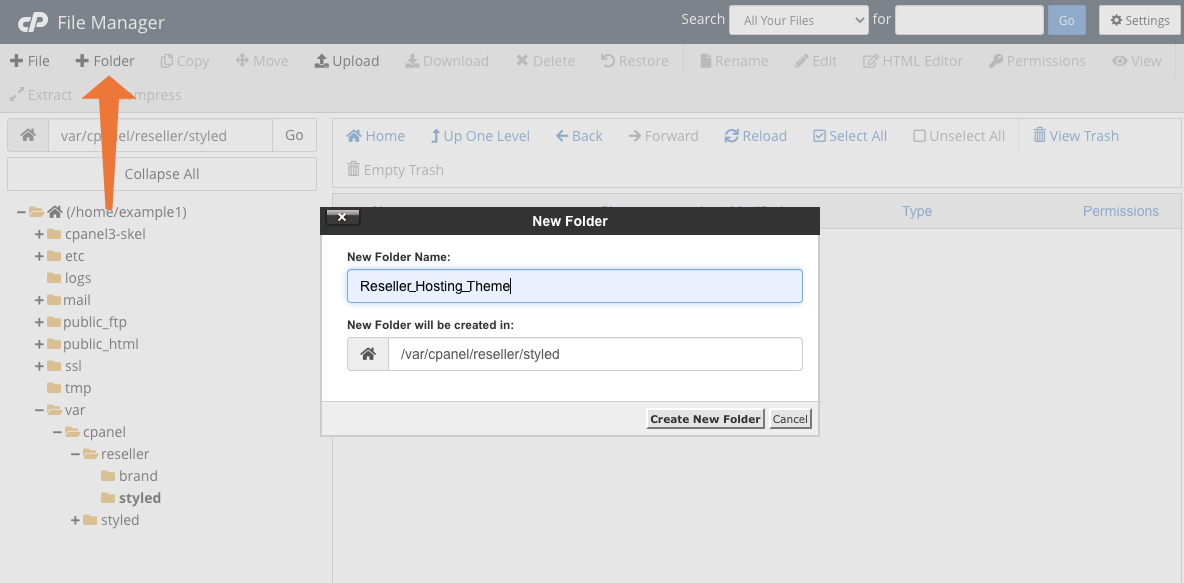
First, we need to create a directory to contain our theme. Custom themes are stored in the var/cpanel/reseller/styled directory. If the styled subdirectory doesn’t exist, create it with the +Folder button.
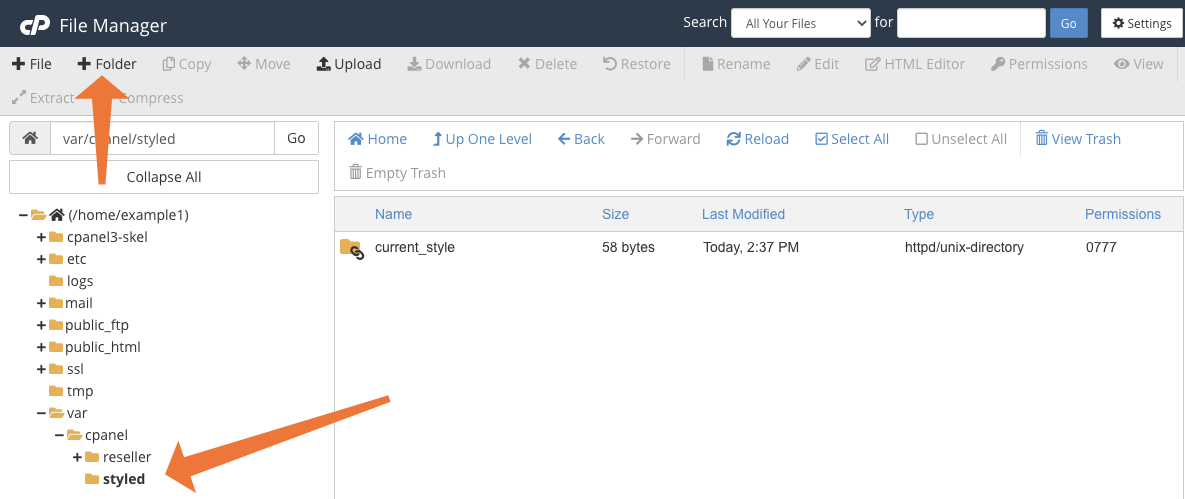
Inside the styled directory, make a new directory and give it an appropriate name for your theme. Don’t use spaces in the filename. Use underscores instead, and cPanel will convert them to spaces in the interface.
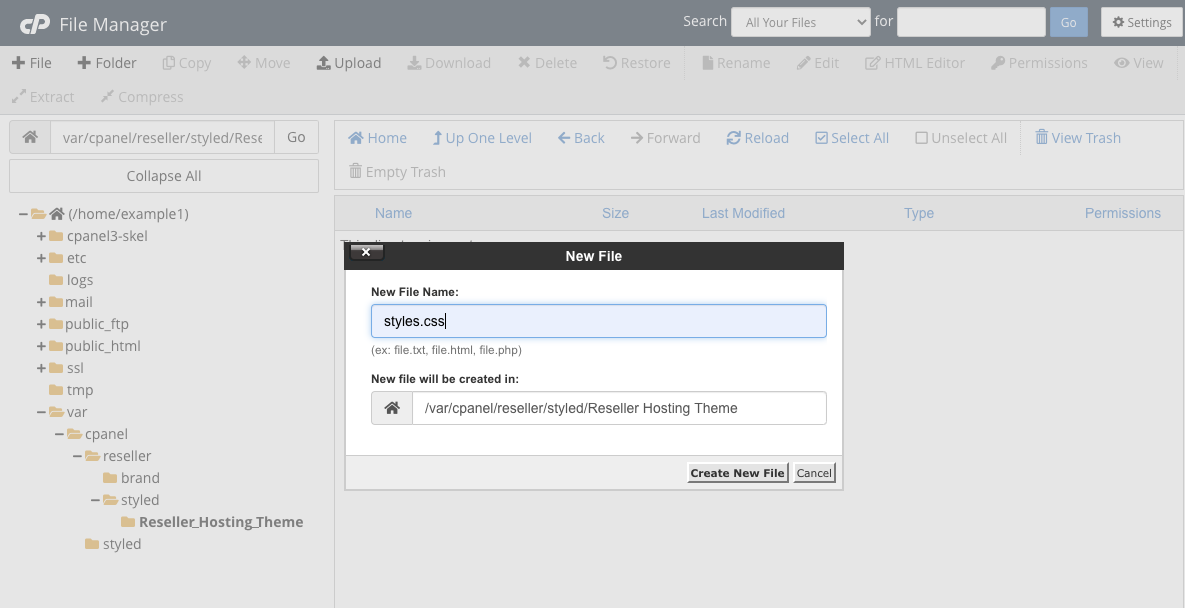
Use the +File button to create a file inside your theme directory called styles.css. Be sure to use that filename, or your theme won’t work.
Open styles.css with the Edit button in the toolbar. We’re going to add CSS directives to override the defaults. Add the following CSS to your styles.css file and click Save in the toolbar.
.navbar-header {background-color: #3f7cac;}This code:
- Identifies the navigation bar with the .navbar-header CSS selector.
- Defines the property we’d like to change, in this case, background-color.
- Supplies a color as a hex color code.
We don’t have the space to go into too many details about CSS here, but you can find lots of information at the Mozilla Developer Network.
In the cPanel User dropdown menu, select Change Style, and click Apply on the theme you have just created.
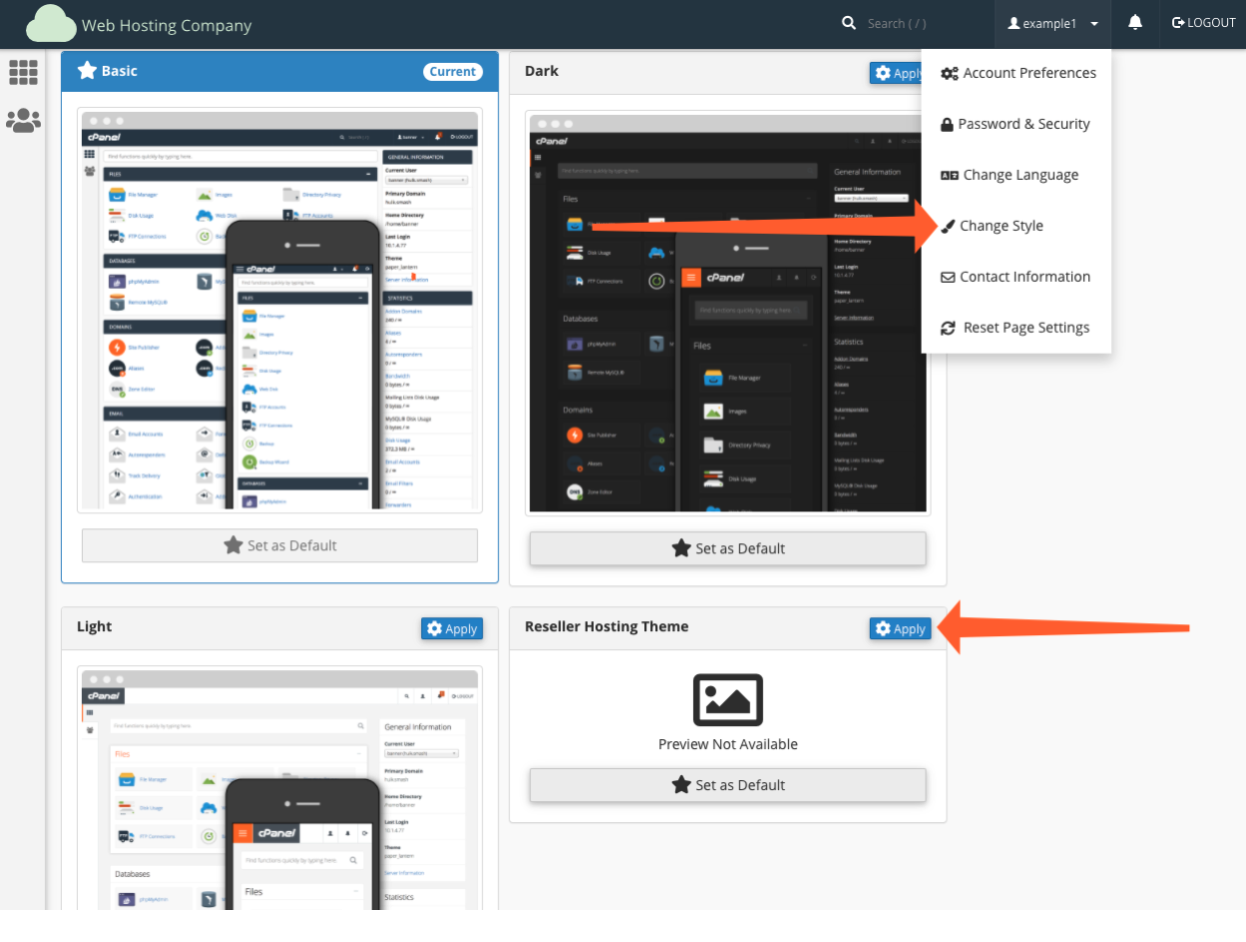
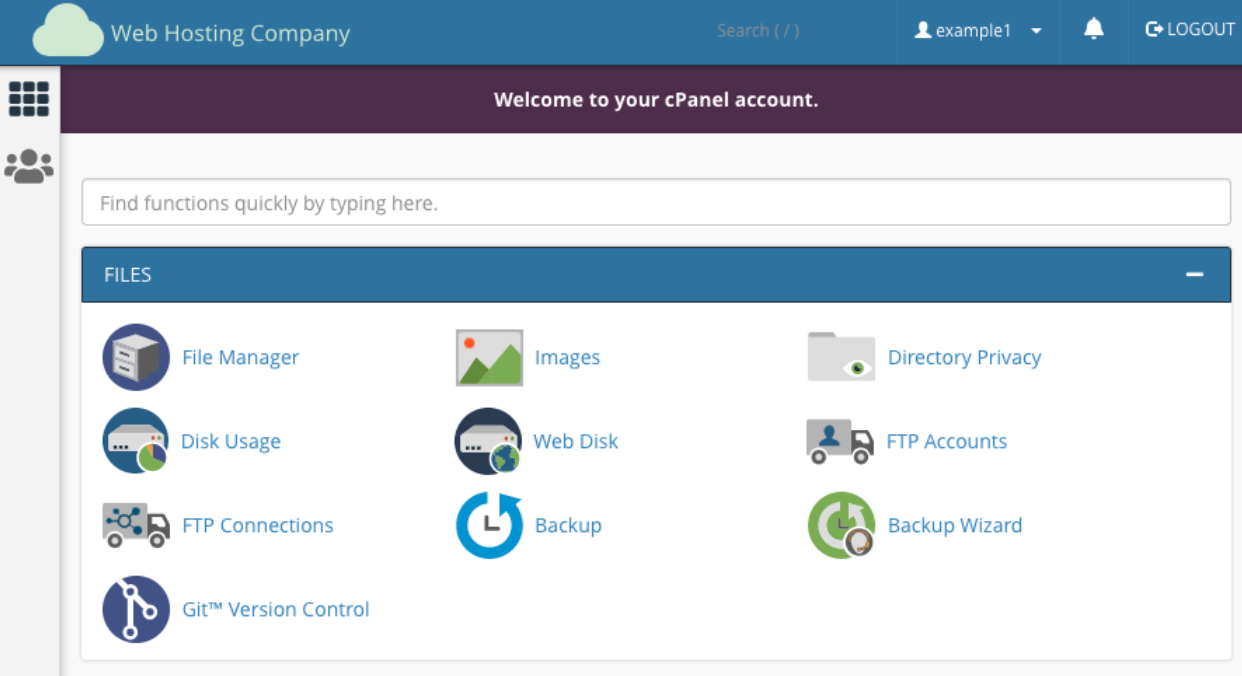
Now that you are running your new theme, the navigation bar will change to the color you selected in CSS, in our case, a light blue.

You can change the color of most interface elements in this way, but there’s one problem. How do you know which CSS selector to use? We’ll explain how to find out with another example.
Finding CSS Selectors for cPanel Reseller Themes
We had a light blue navigation bar in the last image, but the menu section headers were a different color. Ideally, we want them to match, so we have to apply the same CSS transformation.
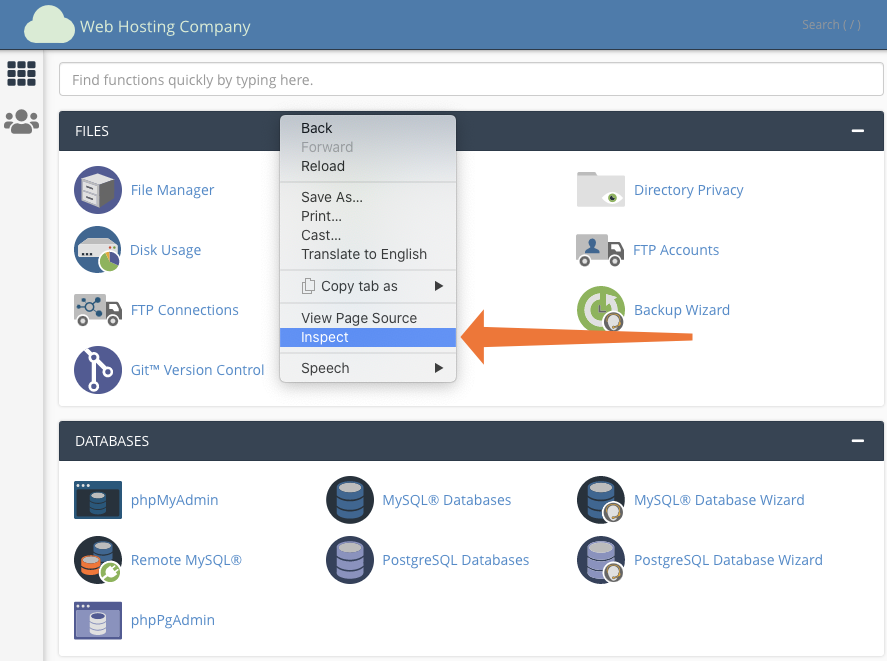
Fortunately, web browsers make it quite easy to find the right CSS selector. We’ll show you how it’s done in Google® Chrome™ , but other browsers support a similar method.
Open cPanel and right-click on the element you would like to modify. Select Inspect from the menu.
The browser opens its web inspector with the code for the element you selected highlighted. To the right is a list of the CSS directives that influence that element. Find the one that controls the property you would like to change.
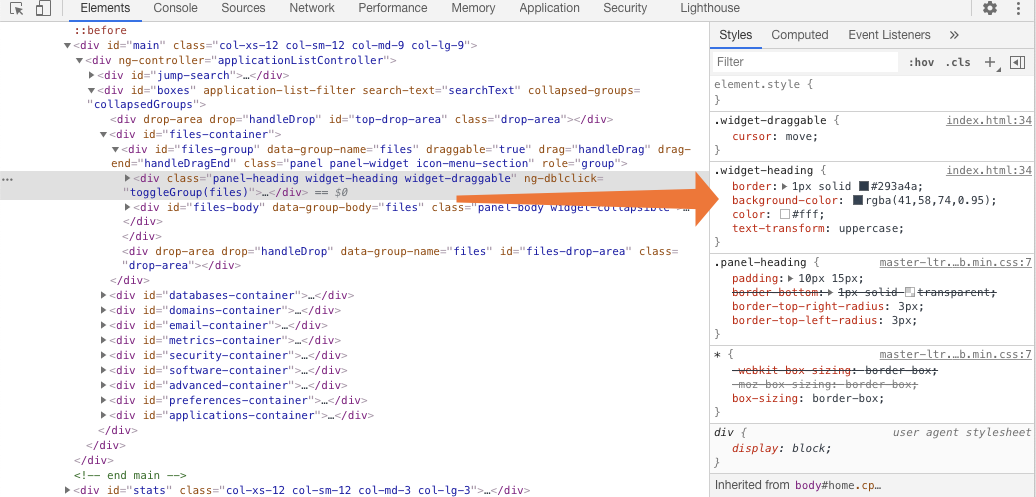
In this case, the selector is .widget-heading, so we can add the following CSS to our styles.css file.
.widget-heading { background-color: #3f7cac;}Save the file and refresh cPanel. The navigation bar and menu items now match.

Finding the right CSS selector isn’t always so straightforward, but once you are familiar with the web inspector, you will quickly identify theme elements and write CSS to change them.
Customizing Reseller Theme Content in cPanel
In addition to modifying a reseller hosting accounts’ appearance, you can also insert or change text on cPanel pages. The page content is controlled by templates, and there are several that influence the content in the main page area.
- Global header and footer templates, which affect every page in cPanel. They are named global_header.html.tt and global_footer.html.tt.
- Feature-specific header and footer templates, named after each feature. For example, the FTP page’s templates are called ftp_page_header.html.tt and ftp_page_footer.html.tt
Header templates control content at the top of pages and footer templates at the bottom. Other cPanel features and interface elements have similar templates, which are described in Guide to cPanel Interface Customization – UI Includes.
To add content to cPanel pages, we create the template files in the var/cpanel/reseller/includes/ directory inside the reseller’s hosting account. The includes directory does not exist by default, so you may need to create it.
Let’s add a welcome note to the top of cPanel pages. Follow the same File Manager process outlined in the previous section to create a file called global_header.html.tt in var/cpanel/reseller/includes/.
Open global_header.html.tt in the File Manager text editor, enter the following and click save.
<div style="background-color: #553555; color: #fff; font-weight: bold; padding: 15px; text-align: center;">Welcome to your cPanel account.</div>Refresh cPanel, and the new header message will be displayed at the top of every page.
In this way, you can add HTML, CSS, and JavaScript to any of cPanel’s reseller templates.
Customizing cPanel Reseller Icons
Our icons are designed to help users understand what cPanel’s tools do, but you can change them if they don’t work with your custom theme. We’ll replace the File Manager icon with a flat design that matches our custom logo.
You will need an image file that:
- Is saved in the png format.
- Has a maximum size of 48×48 pixels.
- Has a transparent background.
Icons must be named for the feature they are associated with. In cPanel, features have an app_key, which is used in templates, icons, and other associated assets. You can find the app_key for icons in Guide to cPanel Interface Customization – Appkeys.
The app_key for File Manager is file_manager, so we’ll name our icon file_manager.png. Icons are stored in an icons directory within a custom theme. Navigate to your custom theme in File Manager and create a folder called icons.
Move into the new directory and use the File Manager’s Upload button to upload your icon image.
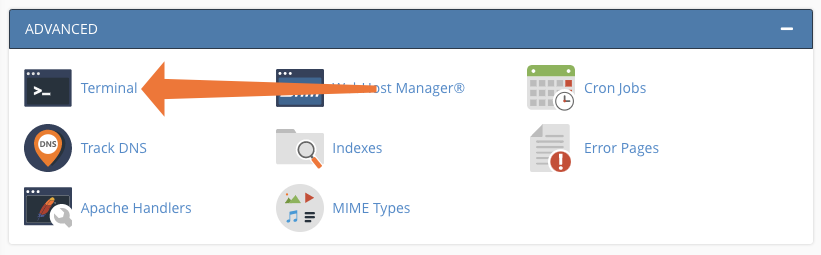
Finally, we need to generate the image sprite that cPanel uses to serve icons efficiently. Log in to the reseller account with SSH or open cPanel’s Terminal interface.
Run the following command, replacing “Reseller_Hosting_Theme” with the name you chose for your theme.
/usr/local/cpanel/bin/sprite_generator --theme paper_lantern --style Reseller_Hosting_ThemeRefresh cPanel, and your new icon will be displayed on the main page.
Make Your Reseller Hosting Theme the Default
The final step is to make the custom theme the default so that when resellers create a cPanel account, it has custom branding. However, before we do that, let’s create a preview image for the Change Style interface.
Take a 500×500 pixel screenshot of your new-look cPanel. Save the file as preview.png and use File Manager to upload it to the theme’s folder.
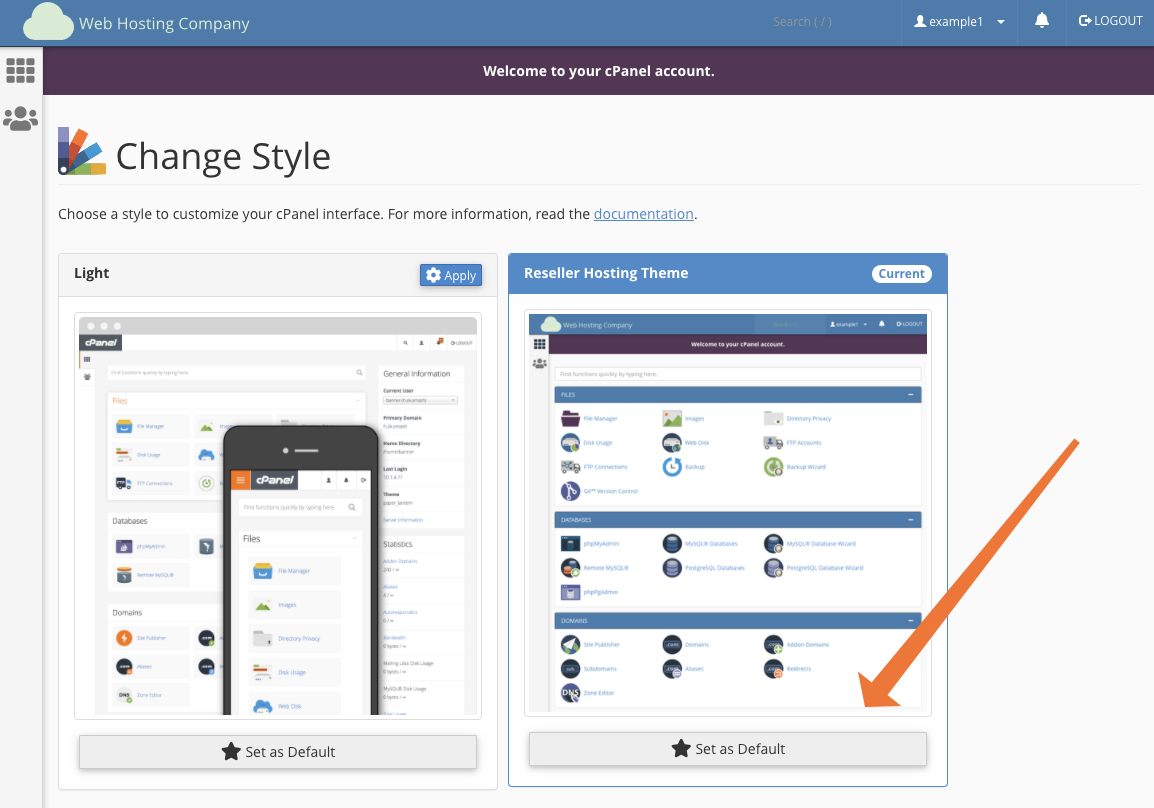
Select Change Style from the navigation bar’s user menu, and you will see the custom theme displayed with its new preview. While you’re here, click the Set as Default button to make it the default for new cPanel accounts.
In this article, we’ve shown you how to transform your web hosting interface into a custom branded UI with unique colors, content, and icons. cPanel & WHM’s flexible theming system gives hosts the tools they need to build a vibrant and impactful branded reseller hosting experience with a coherent and memorable visual identity.
As always, if you have any feedback or comments, please let us know. We are here to help in the best ways we can. You’ll find us on Discord, the cPanel forums, and Reddit.
