
This post was originally added to our blog on January 31st, 2012. It has been updated for accuracy, and readability.
cPanel has made it easier to manage your domains in a single place. In this post, we will go over how to add another domain to your existing cPanel account. This tutorial will require that you have a hosting account and have access to cPanel to add the domain.
Are you unfamiliar with what DNS is or what the different DNS records mean? Please review cPanel’s DNS FAQ article for more information!
In this walkthrough, cpanel.rocks is our primary domain, and cpdocs.com is our addon domain. We will also need the nameservers from the web host, and the IP address that the addon domain will point to. The IP address is found in cPanel by clicking the Server Information tool under General Information and then viewing the Shared IP address value.
Let’s recap with some example information for the necessary DNS information:
- cpanel.rocks— The account’s main domain. This domain was set up for you by your hosting provider. In other words, we already control this domain.
- cpdocs.com — The domain we are going to add to our account.
- ns1.cpanel.rocks — The server’s primary nameserver.
- ns2.cpanel.rocks — The server’s secondary nameserver.
- 209.59.172.159 — The IP address our addon domain will use.
What is an addon domain?
The cPanel “Addon Domains” feature allows you to manage multiple domains from a single hosting account. Unlike with Parked domains, Addon domains are expected to be completely different websites all hosted inside the same cPanel account. You can also create additional sub-accounts (for example, email addresses) for your addon domains.
Why addon domains?
You can use them to save money. With addon domains, you don’t have to purchase an additional hosting account for each domain you operate. You can simply create addon domains and split your existing account’s resources.
Addon domains. How do they work?
Like subdomains, addon domains are stored in a subdirectory in your home directory. Essentially, online visitors to your addon domain are routed to this directory. As shown below, you may specify the name and precise location of this directory when creating the addon domain. Most commonly, the document root for any addon domain will be in /home/$user/$addon-domain/. In our example, the addon domain’s public_html subdirectory will be /home/$user/cpdocs.com/.
What do I need to do before creating the addon domain?
While not required, it’s a good idea to update the DNS of your domain to resolve to the server where it is hosted. We recommend contacting your web host for the proper nameservers and IP address for your server. Then, take this information to your domain’s registrar (or your hosting provider if they are the domain registrar) and update the domain’s DNS settings. If you’re not sure who your domain’s registrar is, you can always search for your domain on WHO.is. This action will perform a lookup and display which company was responsible for registering your domain. If your domain is not registered, this would be the perfect opportunity to purchase the domain from your preferred registrar.
How do I add the addon domain to cPanel?
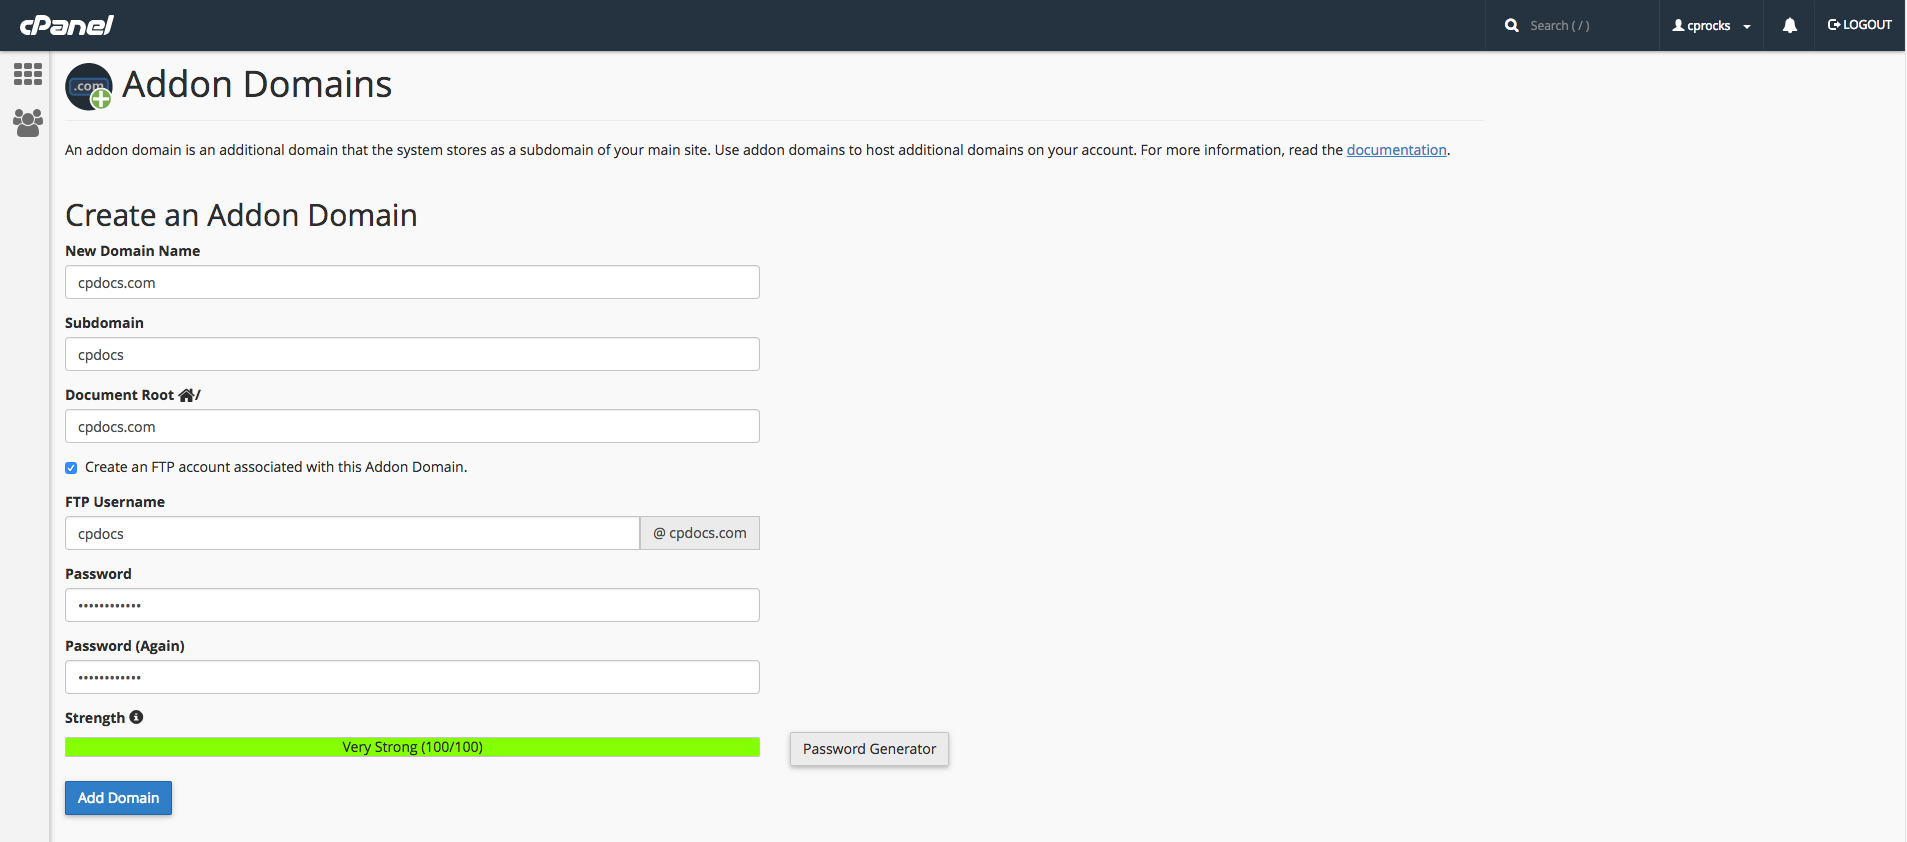
To add an addon domain, we can use cPanel’s Addon Domains feature, in the Domains section of the cPanel interface.

- Enter the domain name in the New Domain Name field. In this case, we will enter cpdocs.com.
- Ensure the FTP username is appropriate in the next field. In this scenario, we will leave it as its default value, cpdocs.
- Make sure that the document root is in the appropriate place. In this example, we will use the default value, /home/$user/cpdocs.com/.
- Enter and confirm the password you want to use with this domain in the appropriate fields. Note- There is a checkbox to create an FTP account when adding your addon domain. Unless you specifically need an FTP account for the addon domain (i.e., allowing limited access to a developer or similar), we do not recommend creating this FTP account.
- Click the Add button.
If you see an error in this interface, that means that your hosting provider has not enabled this feature for your account, or there may be another problem. Please contact your hosting provider to fix the error before continuing.
Verifying our DNS settings
When adding an addon domain, cPanel will automatically create a DNS zone file for the domain. From the Zone Editor interface, we can see that the A record for ‘cpdocs.com’ is set to 209.59.172.159, the cPanel account IP address. If you do not see those options, your account may not have the correct feature permissions. The next step is to talk to your hosting provider to have the Advanced DNS Editor feature added. Once these are enabled, you will be able to see all of the DNS records assigned to your domain.
If you need to assign a different A record to your domain, you may use the “Edit an A record” function in cPanel’s Zone Editor.
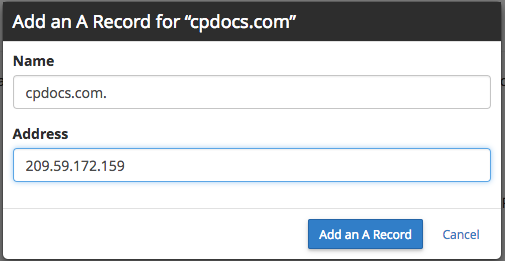
Please make sure when editing the A record for your addon domain, there is a period at the end of the domain name. If this period is missing, the DNS record will be incorrect, as it will not be considered a Fully Qualified Domain Name (FQDN). Now that the DNS record has been added, the domain will begin a period of propagation. DNS records can sometimes take up 24 hours to fully propagate, so a bit of patience will be required. Once the propagation period has passed, your domain will be publicly accessible!
I’ve set up my addon domain! Now what?
Now you can start building your website! Not sure where to get started? Why not give WordPress a try by using the WordPress Manager! You can also discuss all of these awesome features with us over our Discord or Slack channels, on the Official cPanel subreddit, or meet us in person at the 2018 cPanel Conference!
